
# 前言
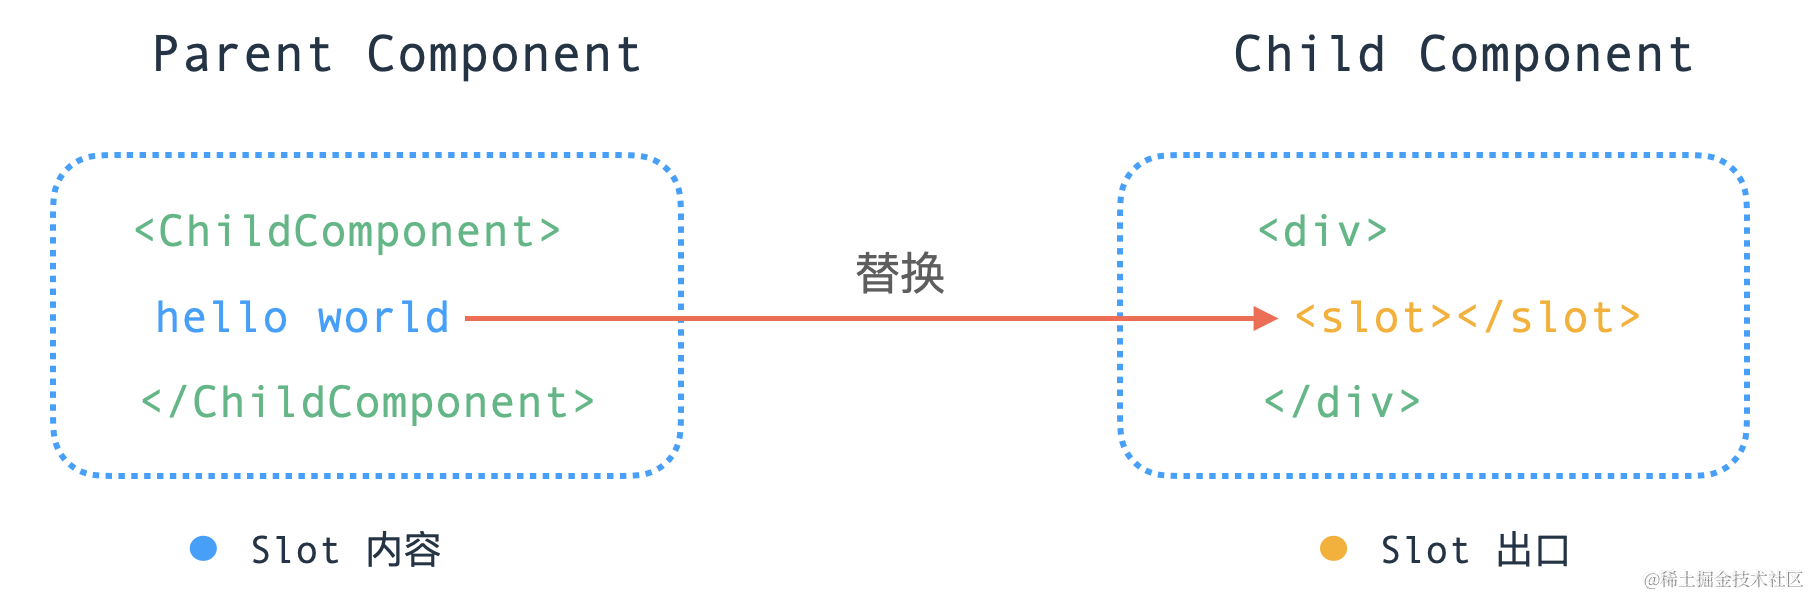
Vue 提供了一个 <slot> 插槽的内置特殊元素,用来实现为子组件传递一些模板片段,然后由子组件完成对这些模版的渲染工作。一个简单的例子,这里有一个父组件,写入了一段插槽模版内容:
html
复制代码<ChildComponent>
  <!-- 插槽内容 -->
  hello world
</ChildComponent>
@前端进阶之旅: 代码已经复制到剪贴板
在子组件 <ChildComponent> 中则通过 <slot> 元素来实现对插槽内容的出口渲染:
html
复制代码<div>
  <!-- 插槽出口 -->
  <slot></slot>
</div>
@前端进阶之旅: 代码已经复制到剪贴板
<slot> 元素是一个插槽出口 (slot outlet),标示了父元素提供的插槽内容 (slot content) 将在哪里被渲染。
接下来,我们将一起探索,插槽内容是如何被渲染到指定出口的。
# 插槽内容渲染
一个组件如果携带一些插槽内容,那么这个组件在渲染的时候,会有哪些变化。先来看一个较为常规的 <slot> 插槽内容用法:
html
复制代码<ChildComponent>
  <template #header>header</template>
  <template #content>content</template>
  <template #footer>footer</template>
</ChildComponent>
@前端进阶之旅: 代码已经复制到剪贴板
经过编译器转换后,生成的渲染函数如下:
import { createTextVNode as _createTextVNode, resolveComponent as _resolveComponent, withCtx as _withCtx, openBlock as _openBlock, createBlock as _createBlock } from "vue"

export function render(_ctx, _cache, $props, $setup, $data, $options) {
  const _component_ChildComponent = _resolveComponent("ChildComponent")