# React Native之Icon 启动图设置|博客系列
> 本文详细介绍了如何在React Native项目中生成和设置不同尺寸的App图标和启动图,涵盖安卓和iOS平台的操作方法,并推荐了实用的在线工具和插件,帮助开发者快速完成应用图标与启动页的适配。
- 原文:https://feinterview.poetries.top/docs/fe-blog-docs/blog-docs/react-native/-React%20Native%E4%B9%8BIcon%20%E5%90%AF%E5%8A%A8%E5%9B%BE%E8%AE%BE%E7%BD%AE
- 来源:前端进阶之旅(feinterview.poetries.top)
- 更新:2025.10.25
---
## 生成不同尺寸的启动图和图标
**方式一**
> [借助Ionic生成不同尺寸的启动图和图标](http://blog.poetries.top/2019/01/10/ionic3-summary/#12-1-%E5%9B%BE%E6%A0%87%E7%94%9F%E6%88%90)
**方式二**
**各种尺寸Icon图标生成**
> 使用图标工厂生成 https://icon.wuruihong.com/
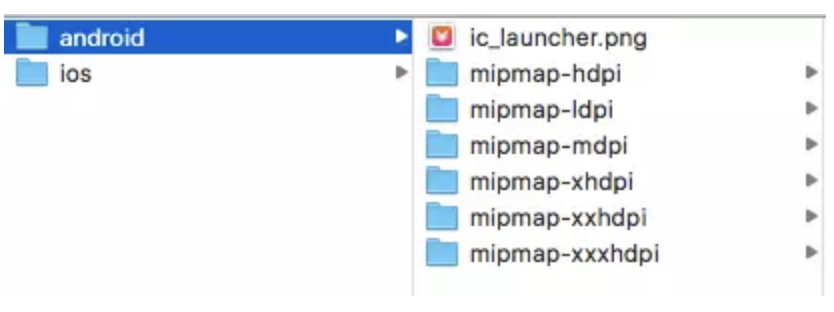
1. 安卓下替换`andriod/app/src/main/res/`下的mipmap文件即可
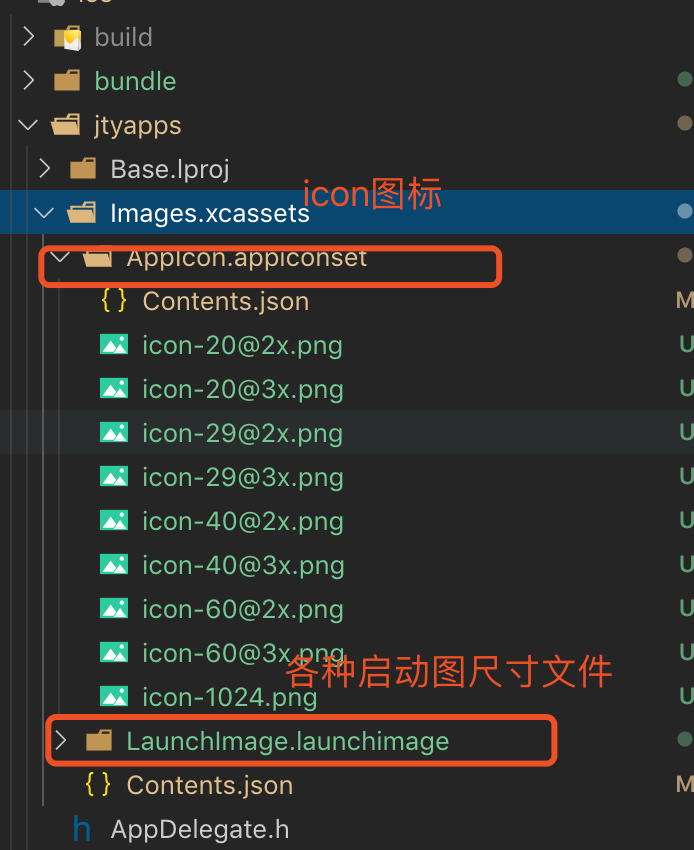
2. iOS下替换如下
**各种尺寸启动图图标生成**
> 启动图也可以使用图标工厂生产了 https://icon.wuruihong.com/splash
1. 安卓下拷贝生成的文件到`andriod/app/src/main/res/`目录下
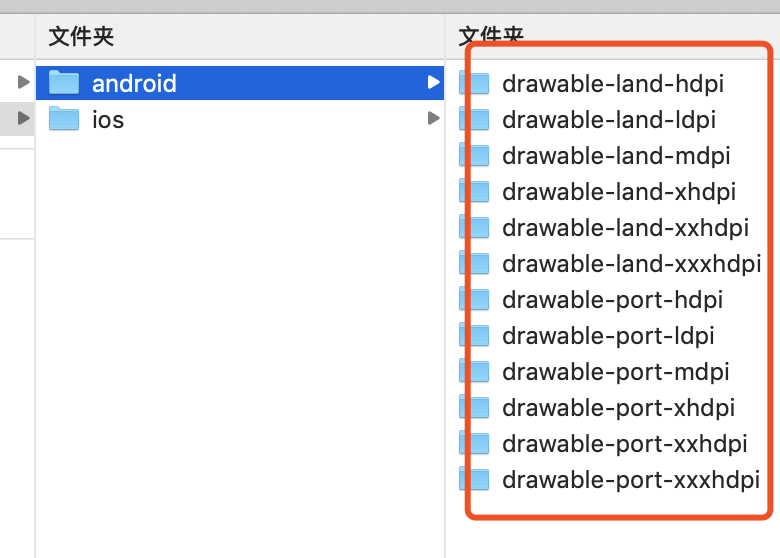

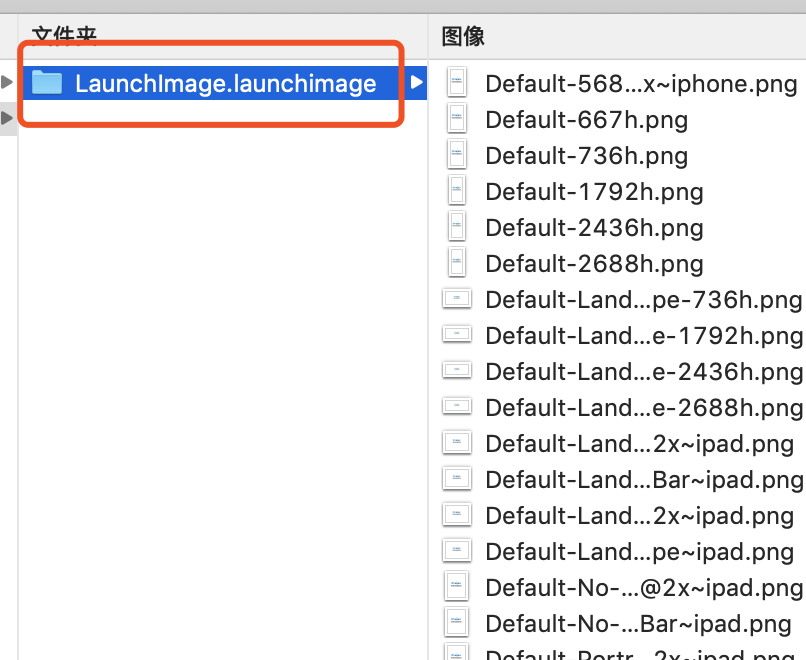
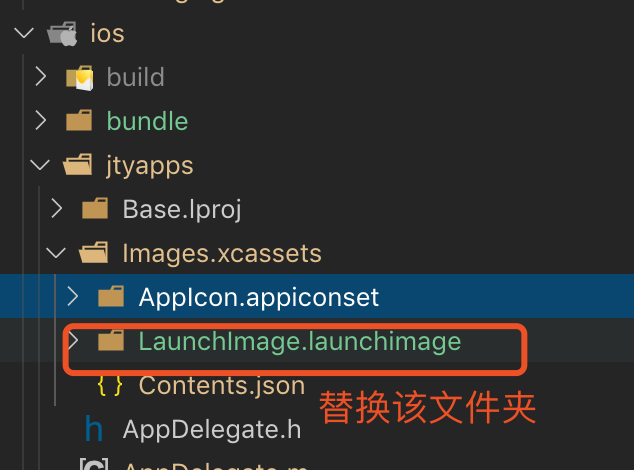
2. iOS下拷贝生成的该文件夹替换即可
## 安卓端
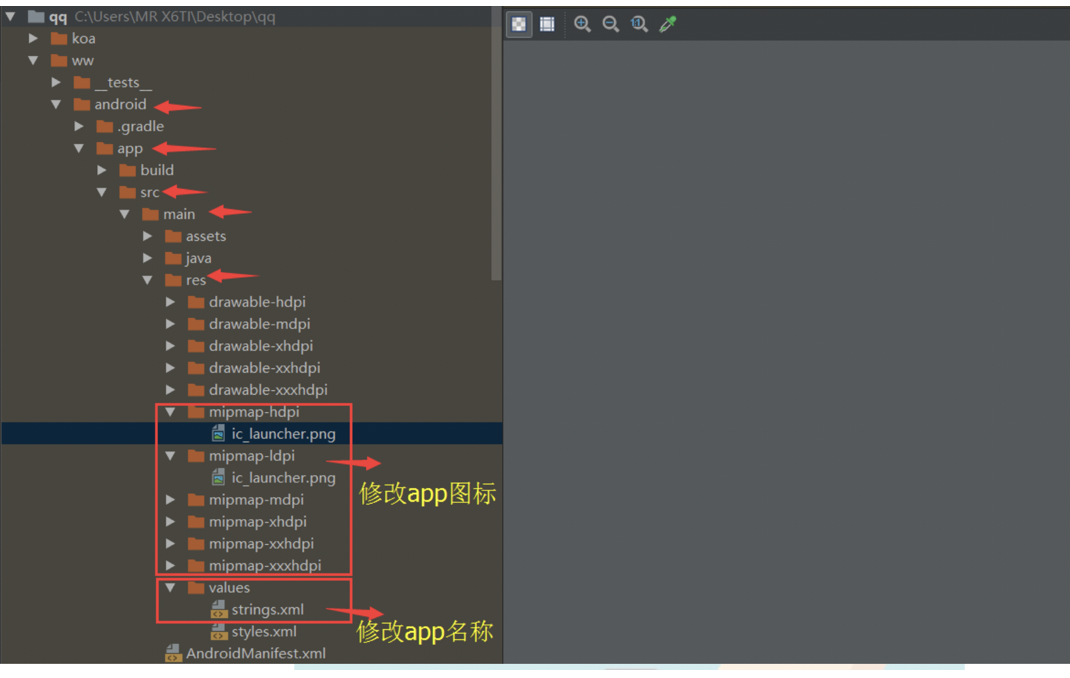
**修改图标和名称**
> 找到根目录`/android/app/src/main/res`
**启动页**
> - 在`react-native`的`android`中的启动图和`IOS`不相同点在于,`android`没有默认的启动图,在`IOS`里面有
> - 使用插件 `import SplashScreen from 'react-native-splash-screen';`
> - https://github.com/crazycodeboy/react-native-splash-screen
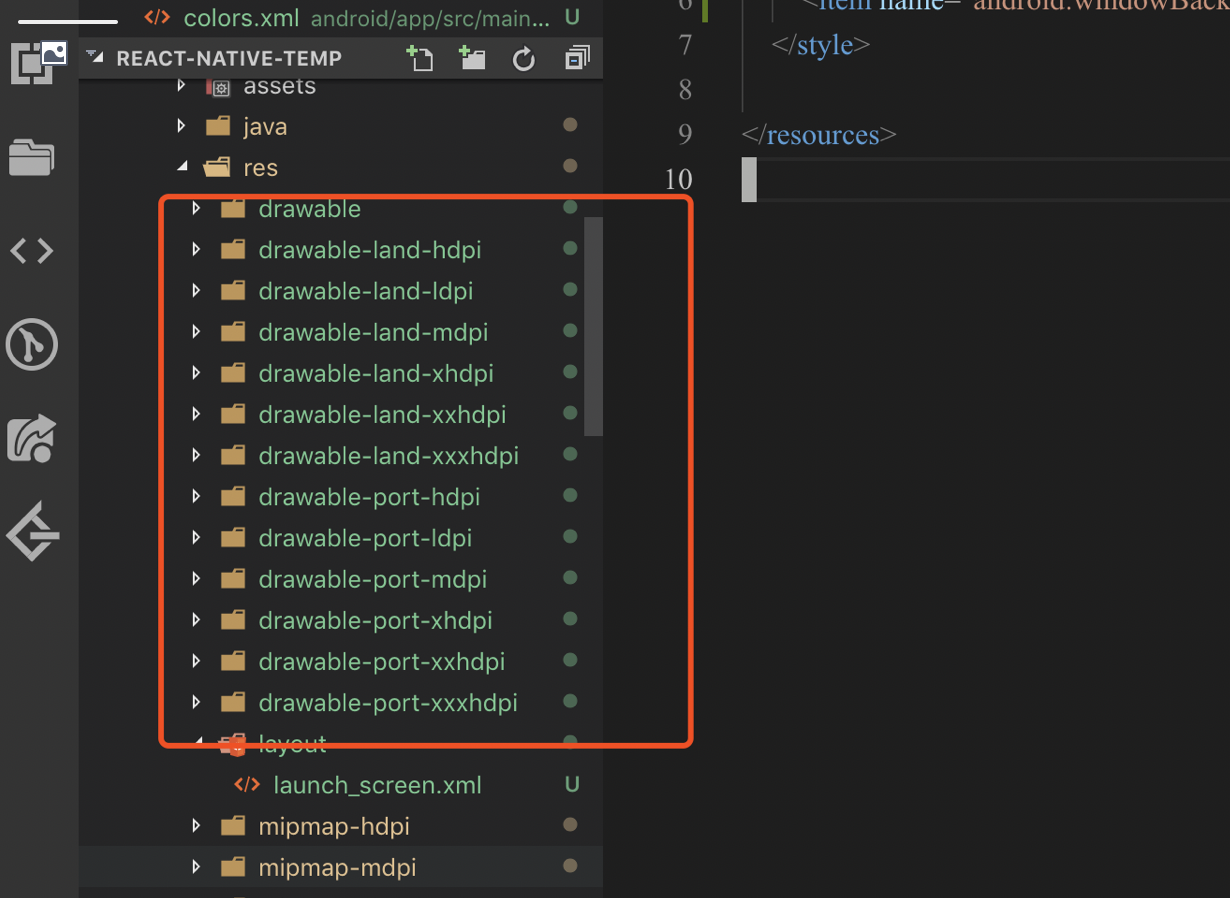
> 把生成好的启动页按这个格式处理即可
## iOS端
**修改app名称**
> 编辑 `ios/test/Info.plist` 文件
```
CFBundleDisplayName
- $(PRODUCT_NAME)
+ 测试程序
```
**修改应用图标**
> 应用图标对尺寸有要求,比较简单地方式是准备一张 `1024*1024` 的图片,然后使用[图标工厂](https://icon.wuruihong.com/)在线生成
> 这里直接从 Sketch iOS 图标设计模板中选取了一张图片,生成后的结果如下
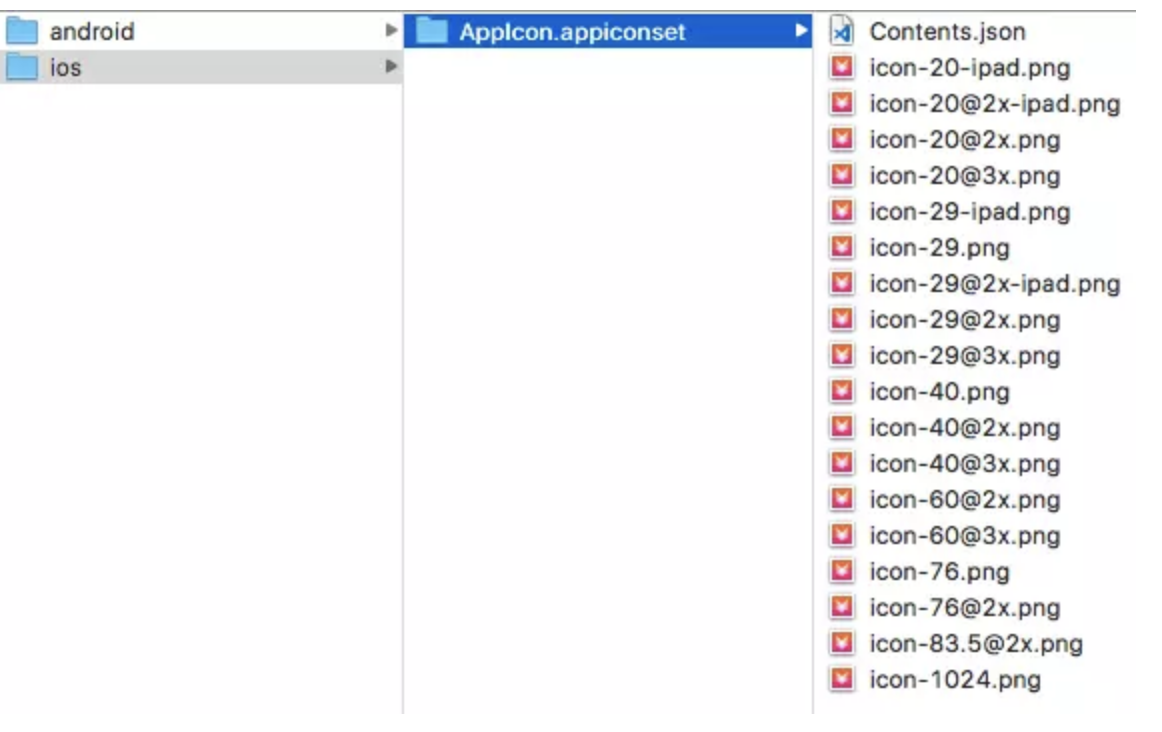
> 我们可以直接用生成好的内容替换默认的图标即可
> 替换 `ios/test/Images.xcassets/AppIcon.appiconset` 中的内容。如果不需要全部尺寸,可以用 XCode 打开项目,点击 `Images.xcassets>AppIcon` 拖入相应尺寸的图标
## 添加启动页
> 添加启动页可以使用 [react-native-splash-screen](https://github.com/crazycodeboy/react-native-splash-screen) 库,通过它可以控制启动页的显示和隐藏
```
$ yarn add react-native-splash-screen
$ react-native link react-native-splash-screen
```
**Android**
> 编辑 `MainActivity.java`,添加显示启动页的代码
```js
import android.os.Bundle; // here
import com.facebook.react.ReactActivity;
// react-native-splash-screen >= 0.3.1
import org.devio.rn.splashscreen.SplashScreen; // here
// react-native-splash-screen < 0.3.1
import com.cboy.rn.splashscreen.SplashScreen; // here
public class MainActivity extends ReactActivity {
@Override
protected void onCreate(Bundle savedInstanceState) {
SplashScreen.show(this); // here
super.onCreate(savedInstanceState);
}
// ...other code
}
```
> 在 `android/app/src/main/res/layout` 文件夹下创建启动页布局文件 `launch_screen.xml`
```html
```
> 将启动页图片放置在 `drawable` 文件夹下
```
drawable-ldpi
drawable-mdpi
drawable-hdpi
drawable-xhdpi
drawable-xxhdpi
drawable-xxxhdpi
```
- Android 会自动缩放 drawable 下的图片,所以我们不必为所有分辨率的设备准备启动图
- 完成上述操作后,重新打包应用,再启动时就可以看到启动页了。不过,启动页显示之前会有短暂的白屏,我们可以通过设置透明背景来处理。编辑 `android/app/src/main/res/values/styles.xml` 文件,修改如下
```html
```
**iOS**
> [图标配置参考](https://github.com/phodal/growth/tree/master/ios/growth/Images.xcassets/AppIcon.appiconset)
```js
#import "AppDelegate.h"
#import
#import
#import "RNSplashScreen.h" // here
@implementation AppDelegate
- (BOOL)application:(UIApplication *)application didFinishLaunchingWithOptions:(NSDictionary *)launchOptions
{
// ...other code
[RNSplashScreen show]; // here
return YES;
}
@end
```
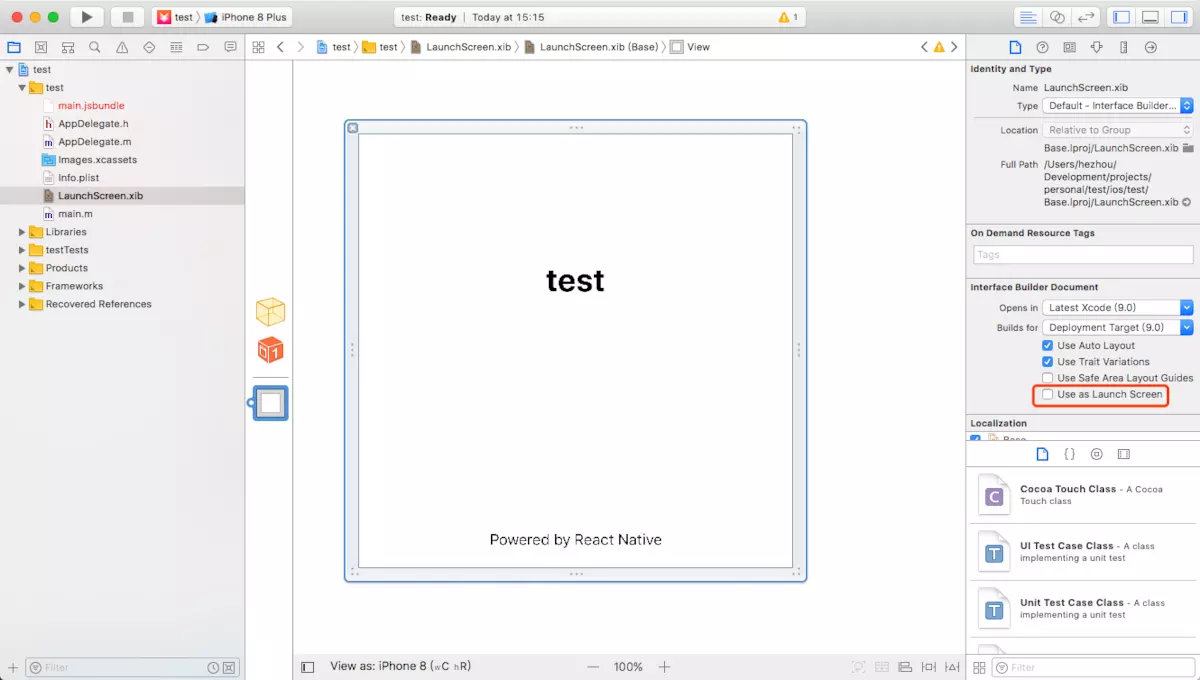
> 用 XCode 打开项目,选中 `LaunchScreen.xib` 中的 `View`,取消选中 `Use Launch Screen`
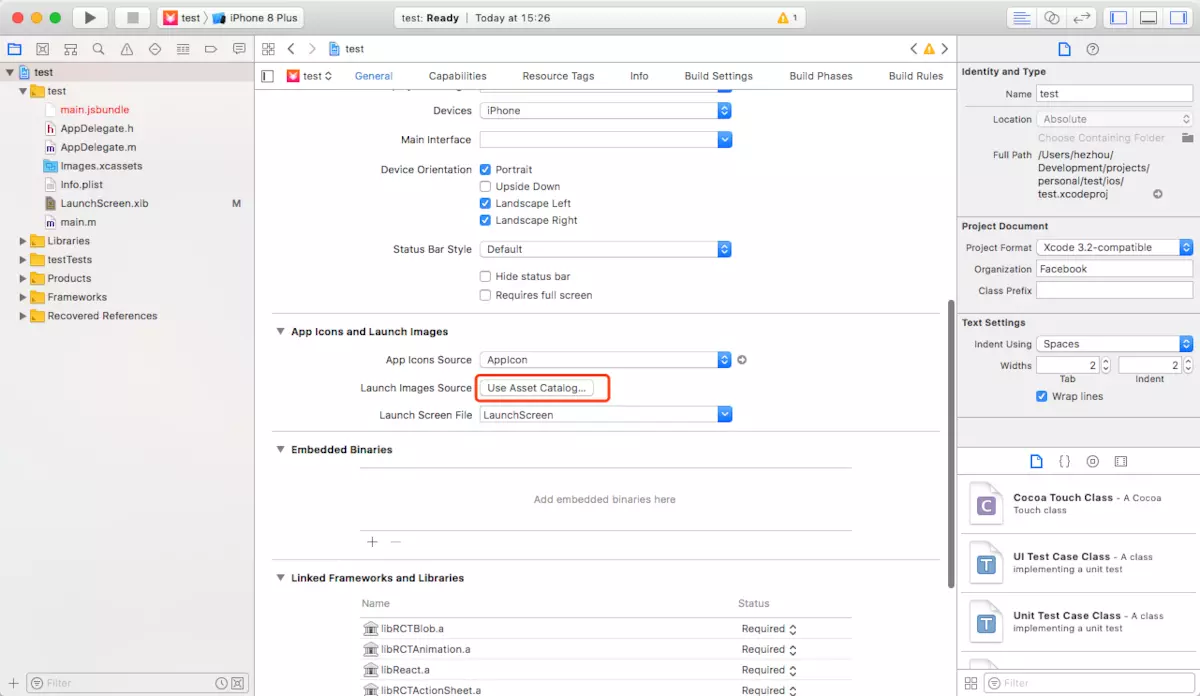
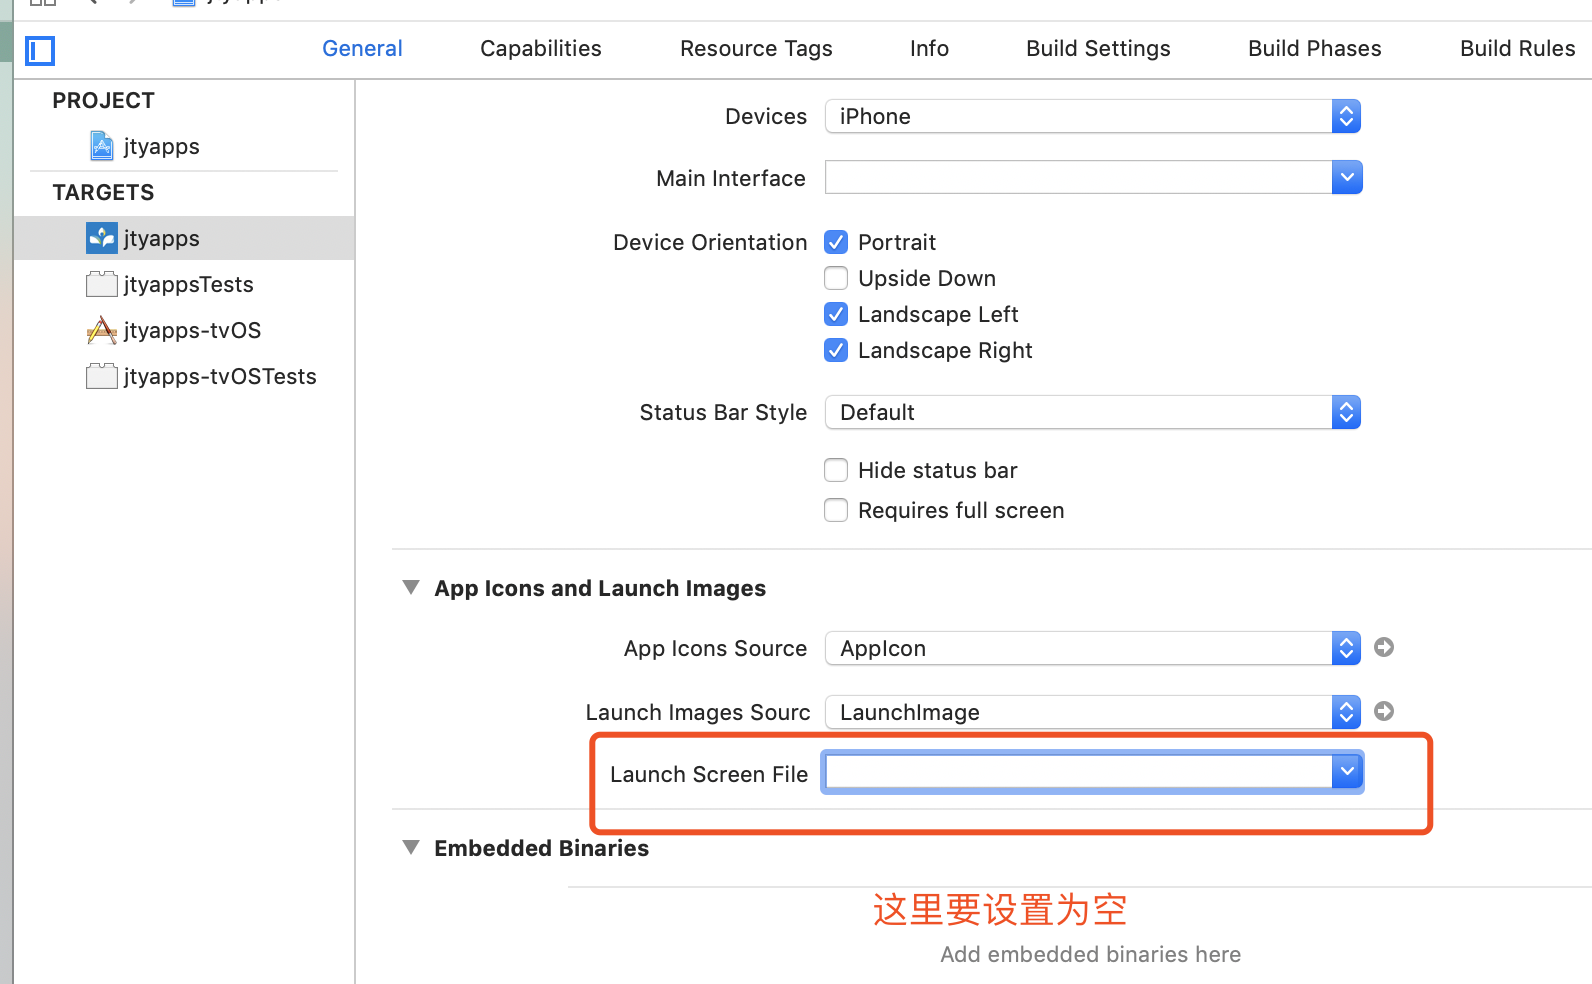
> 选中项目,在 `General` 配置中设置 `Launch Images Srouce`,点击 `Use Asset Catalog`,弹出对话框中使用默认即可(此操作会在 `Images.xcassets` 中创建 `LaunchImage`),然后设置 `Launch Screen File` 为空

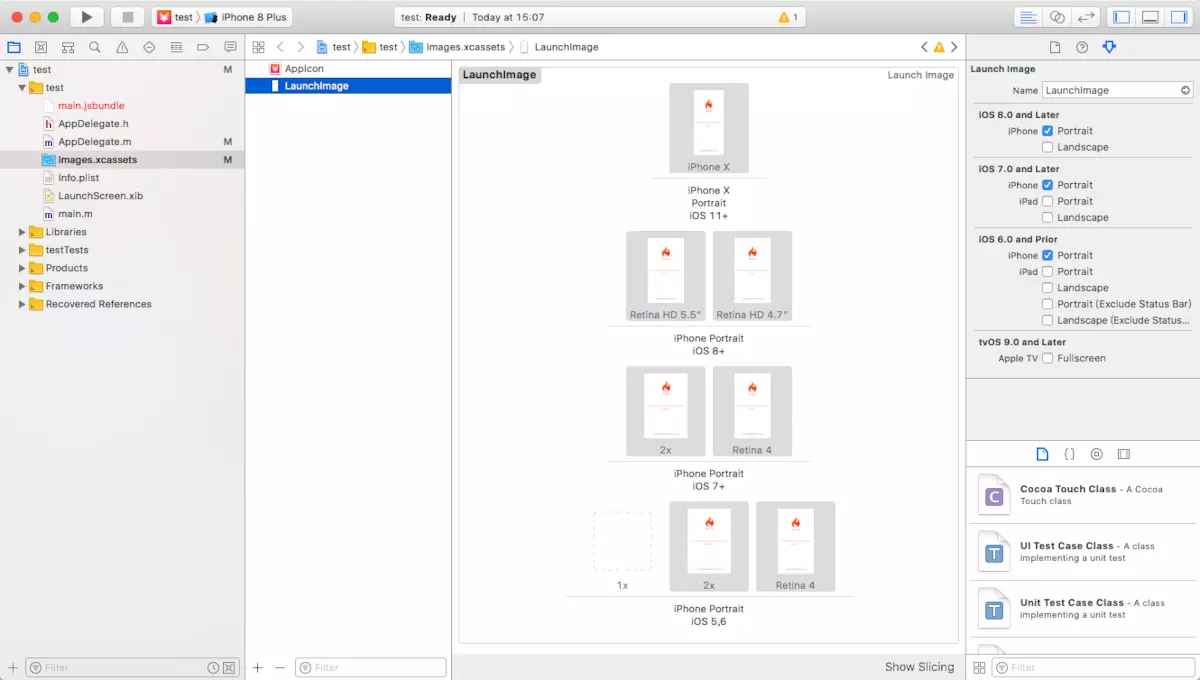
> 点击 `Images.xcassets > LaunchImage`,在右侧属性栏处选择要支持的设备。接着,添加对应分辨率的图片,分辨率对照如下
|设备 |分辨率|
|---|---|
|`iOS 11+ `| `1125*2436`|
|`iOS 8+ Retina HD 5.5`| `1242*2208`|
|`iOS 8+ Retina HD 4.7`| `750*1334`|
|`iOS 7+ 2x `| `640*960`|
|`iOS 7+ Retina 4`| `640*1136`|
|`iOS 5,6 1x`| `320*480`|
|`iOS 5,6 2x`| `640*960`|
|`iOS 5,6 Retina 4`| `640*1136`|
**安卓的尺寸**
|设备 |分辨率|
|---|---|
|`mdpi:`|`375*667`|
|`hdpi:`|`563*1001`|
|`xhdpi:`|`750*1334`|
|`xxhdpi:`|`1125*2001`|
|`xxxhdpi:`|`1500*2668`|
完成上述操作之后,重新安装 APP 再启动时就可以看到启动页