# Angular7入门总结篇|博客系列
> 本文系统总结了Angular7的基础知识、环境搭建、项目创建流程及常用开发技巧,适合前端开发者快速入门和掌握Angular7框架,涵盖实用操作步骤与注意事项,帮助读者高效构建企业级Web应用。
- 原文:https://feinterview.poetries.top/docs/fe-blog-docs/blog-docs/angular/-Angular7%E5%85%A5%E9%97%A8%E6%80%BB%E7%BB%93%E7%AF%87
- 来源:前端进阶之旅(feinterview.poetries.top)
- 更新:2025.10.25
- 可见范围:免费部分
---
## 一、Angular 介绍
> `Angualr` 是一款来自谷歌的开源的 `web` 前端框架,诞生于 `2009` 年,由 `Misko Hevery` 等 人创建,后为 `Google` 所收购。是一款优秀的前端 `JS` 框架,已经被用于 `Google` 的多款产品当中。
- 根据项目数统计 `angular(1.x 、2.x 、4.x、5.x、6.x、7.x)`是现在网上使用量最大的框架
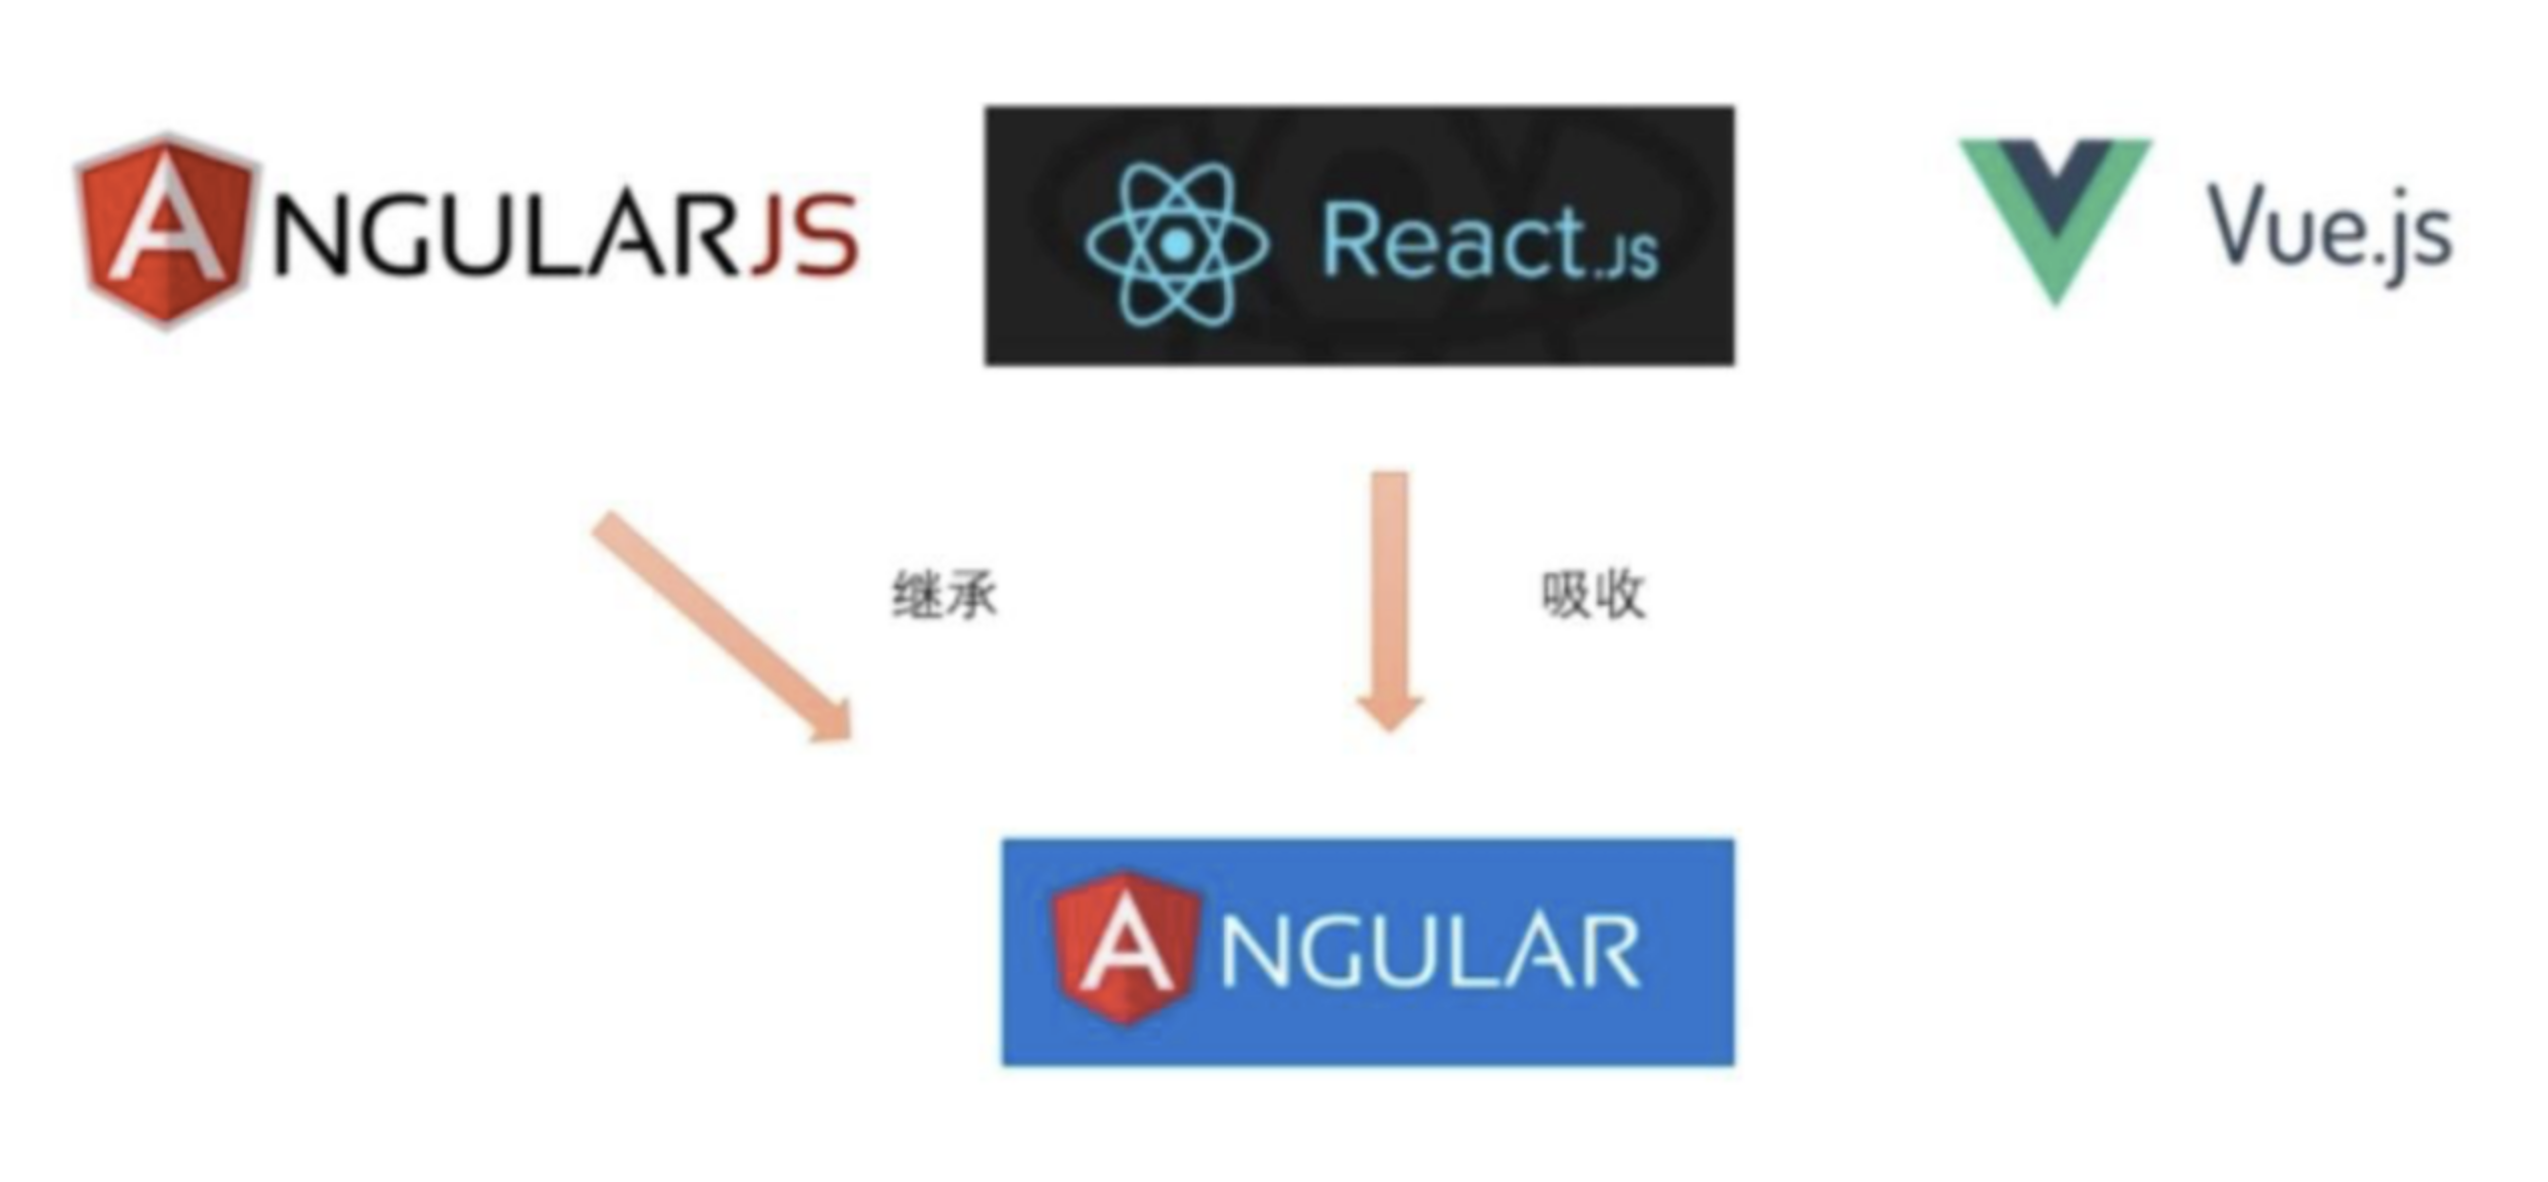
- `Angualr` 基于 `TypeScript` 和 `react`、`vue` 相比, `Angular` 更适合中大型企业级项目。
> 目前 2018 年 11 月 25 日 `angular` 最新版本 `angular7.x`。根据官方介绍,`Angular` 每过几个月 就会更新一个版本。此教程同样适用于后期更新的 `Angular8.x`、`Angular9.x`
**学习 Angular 必备基础**
> 必备基础:`html` 、`css` 、`js`、`es6`、`Typescript`
## 二、Angular 环境搭建及创建项目
## 2.1 环境搭建
**1. 安装 nodejs**
> 安装 `angular` 的计算机上面必须安装最新的 `nodejs`--注意安装 `nodejs` 稳定版本
**2. 安装 cnpm**
> npm 可能安装失败建议先用 `npm` 安装一下 `cnpm` 用淘宝镜像安装`https://npm.taobao.org`
```bash
npm install -g cnpm --registry=https://registry.npm.taobao.org
```
**3. 使用 npm/cnpm 命令安装 angular/cli**
```bash
npm install -g @angular/cli
# 或者
cnpm install -g @angular/cli
```
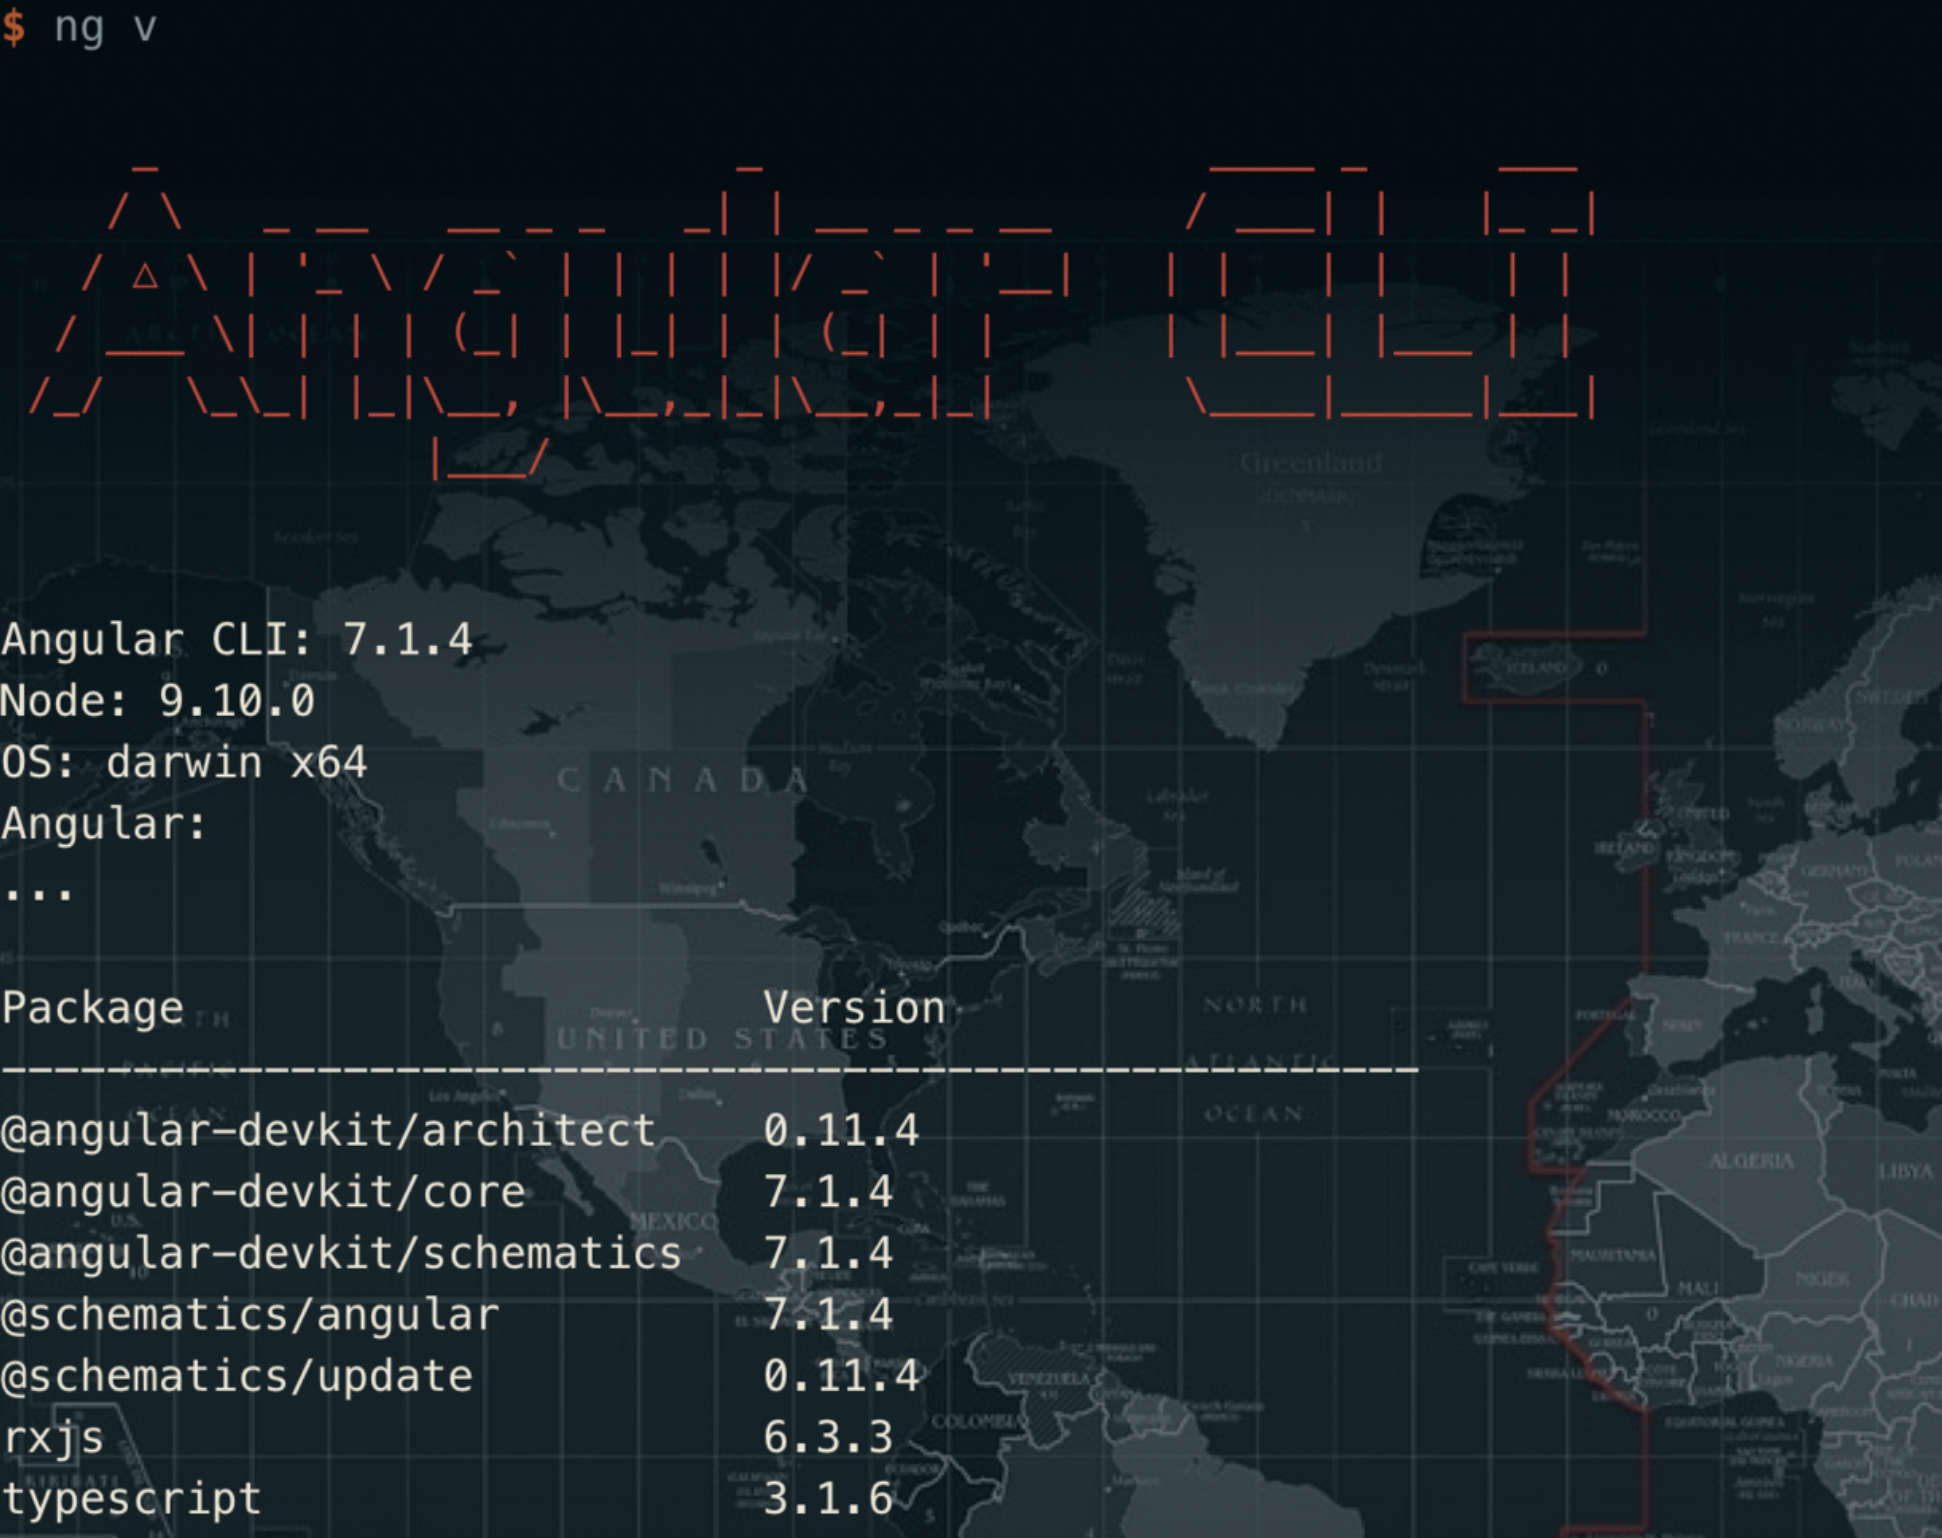
> `ng v` 查看版本信息
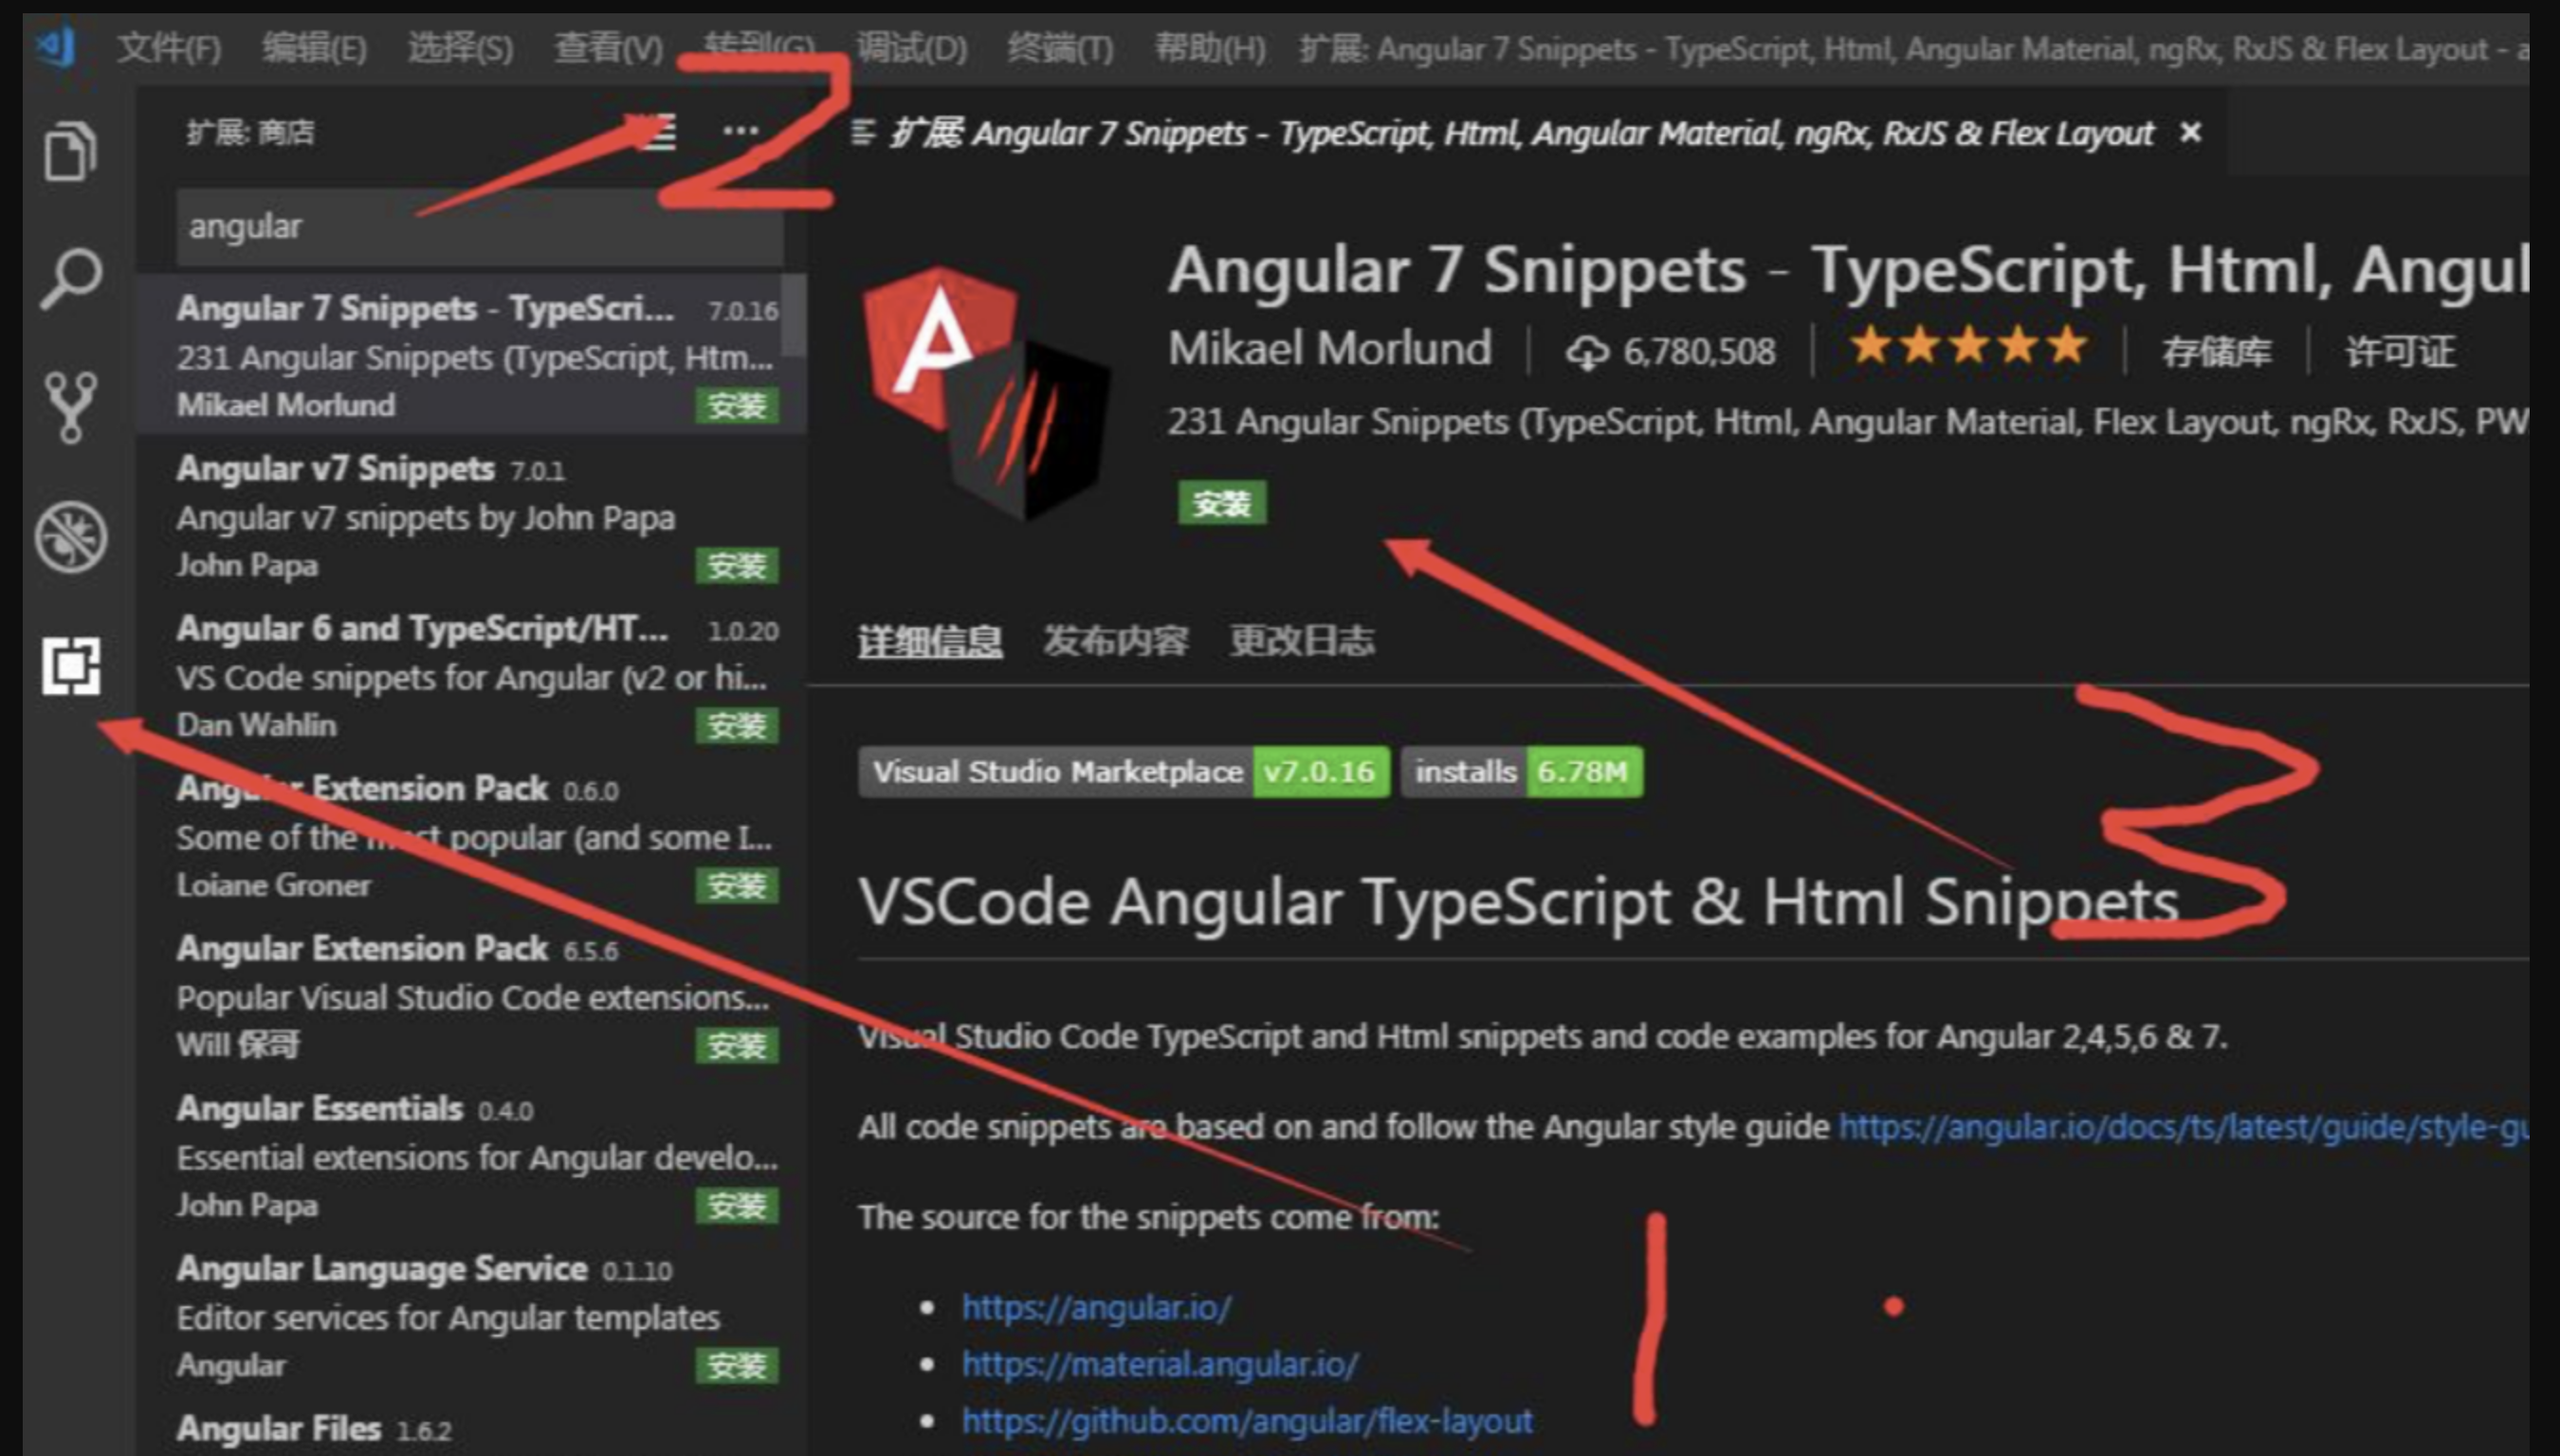
**4. 安装插件**
**5. 安装chrome扩展**
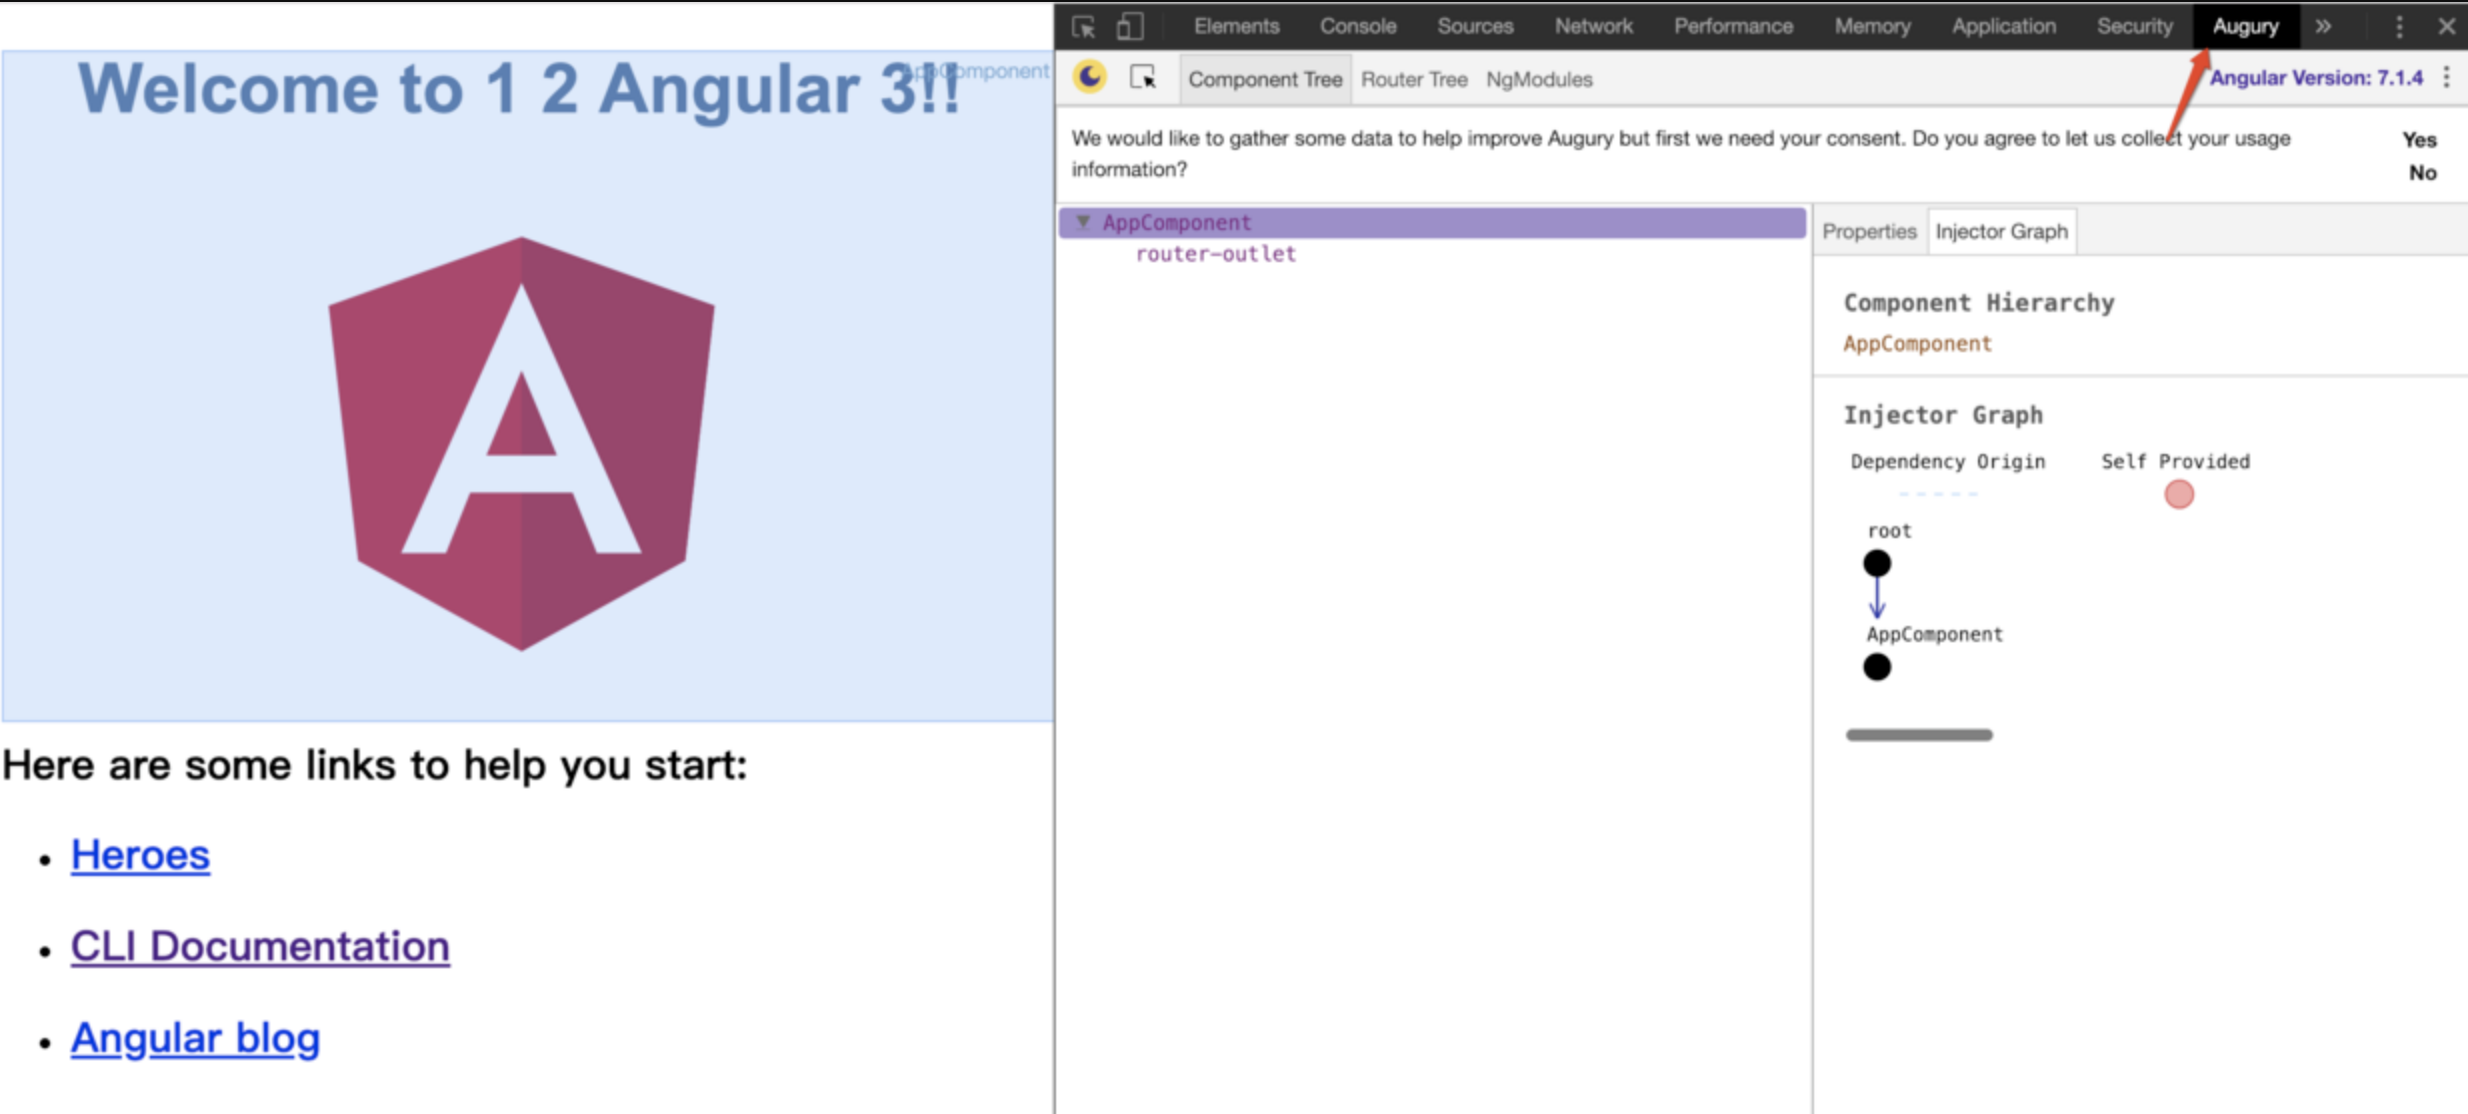
> https://augury.angular.io/
> 用`augury`查看`component`结构,更方便调试
## 2.2 创建项目
```bash
# 创建项目
ng new my-app
cd my-app
# 运行项目
ng serve --open
```
## 2.3 目录结构分析
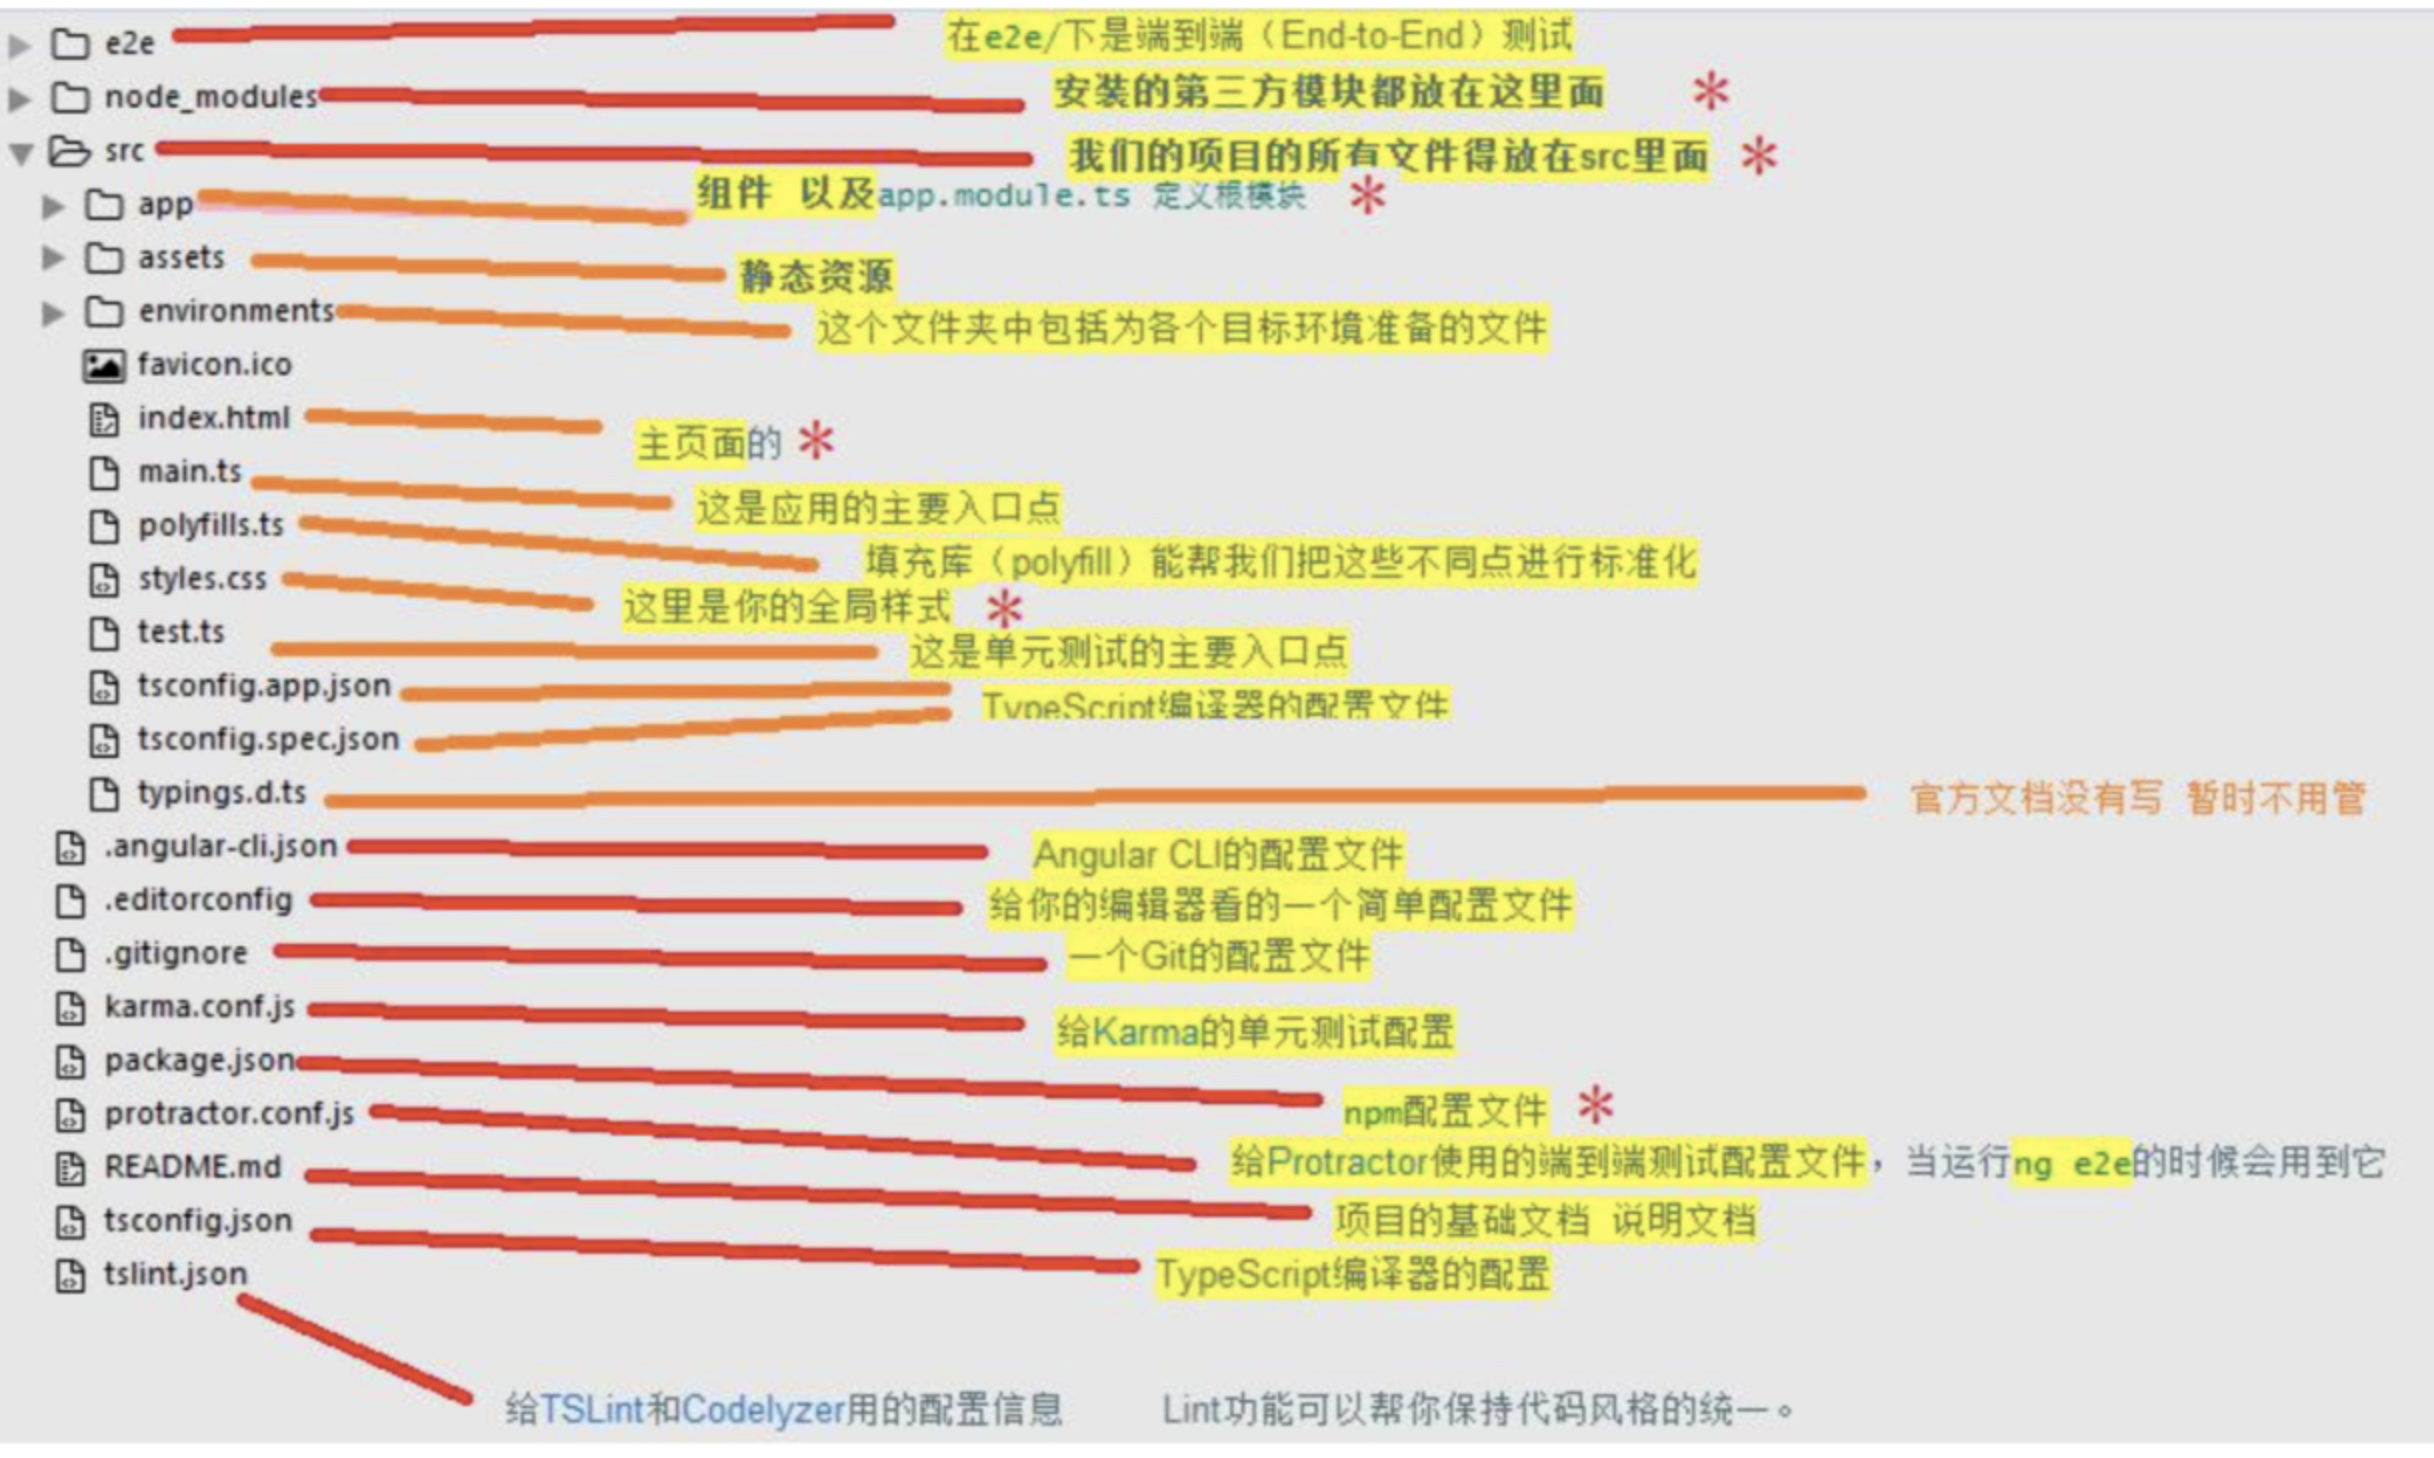
> 详情参考 https://www.angular.cn/guide/file-structure
**app目录(重点)**
> `app`目录是我们要编写的代码目录。我们写的代码都是放在这个目录。
一个`Angular`程序至少需要一个模块和一个组件。在我们新建项目的时候命令行已经默认生成出来了
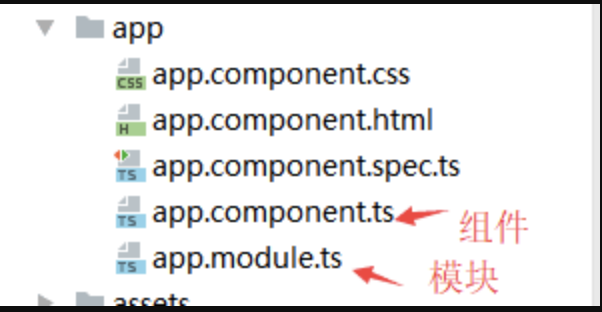
- `app.component.ts`:这个文件表示组件,
- 组件是`Angular`应用的基本构建模块,可以理解为一段带有业务逻辑和数据的`Html`
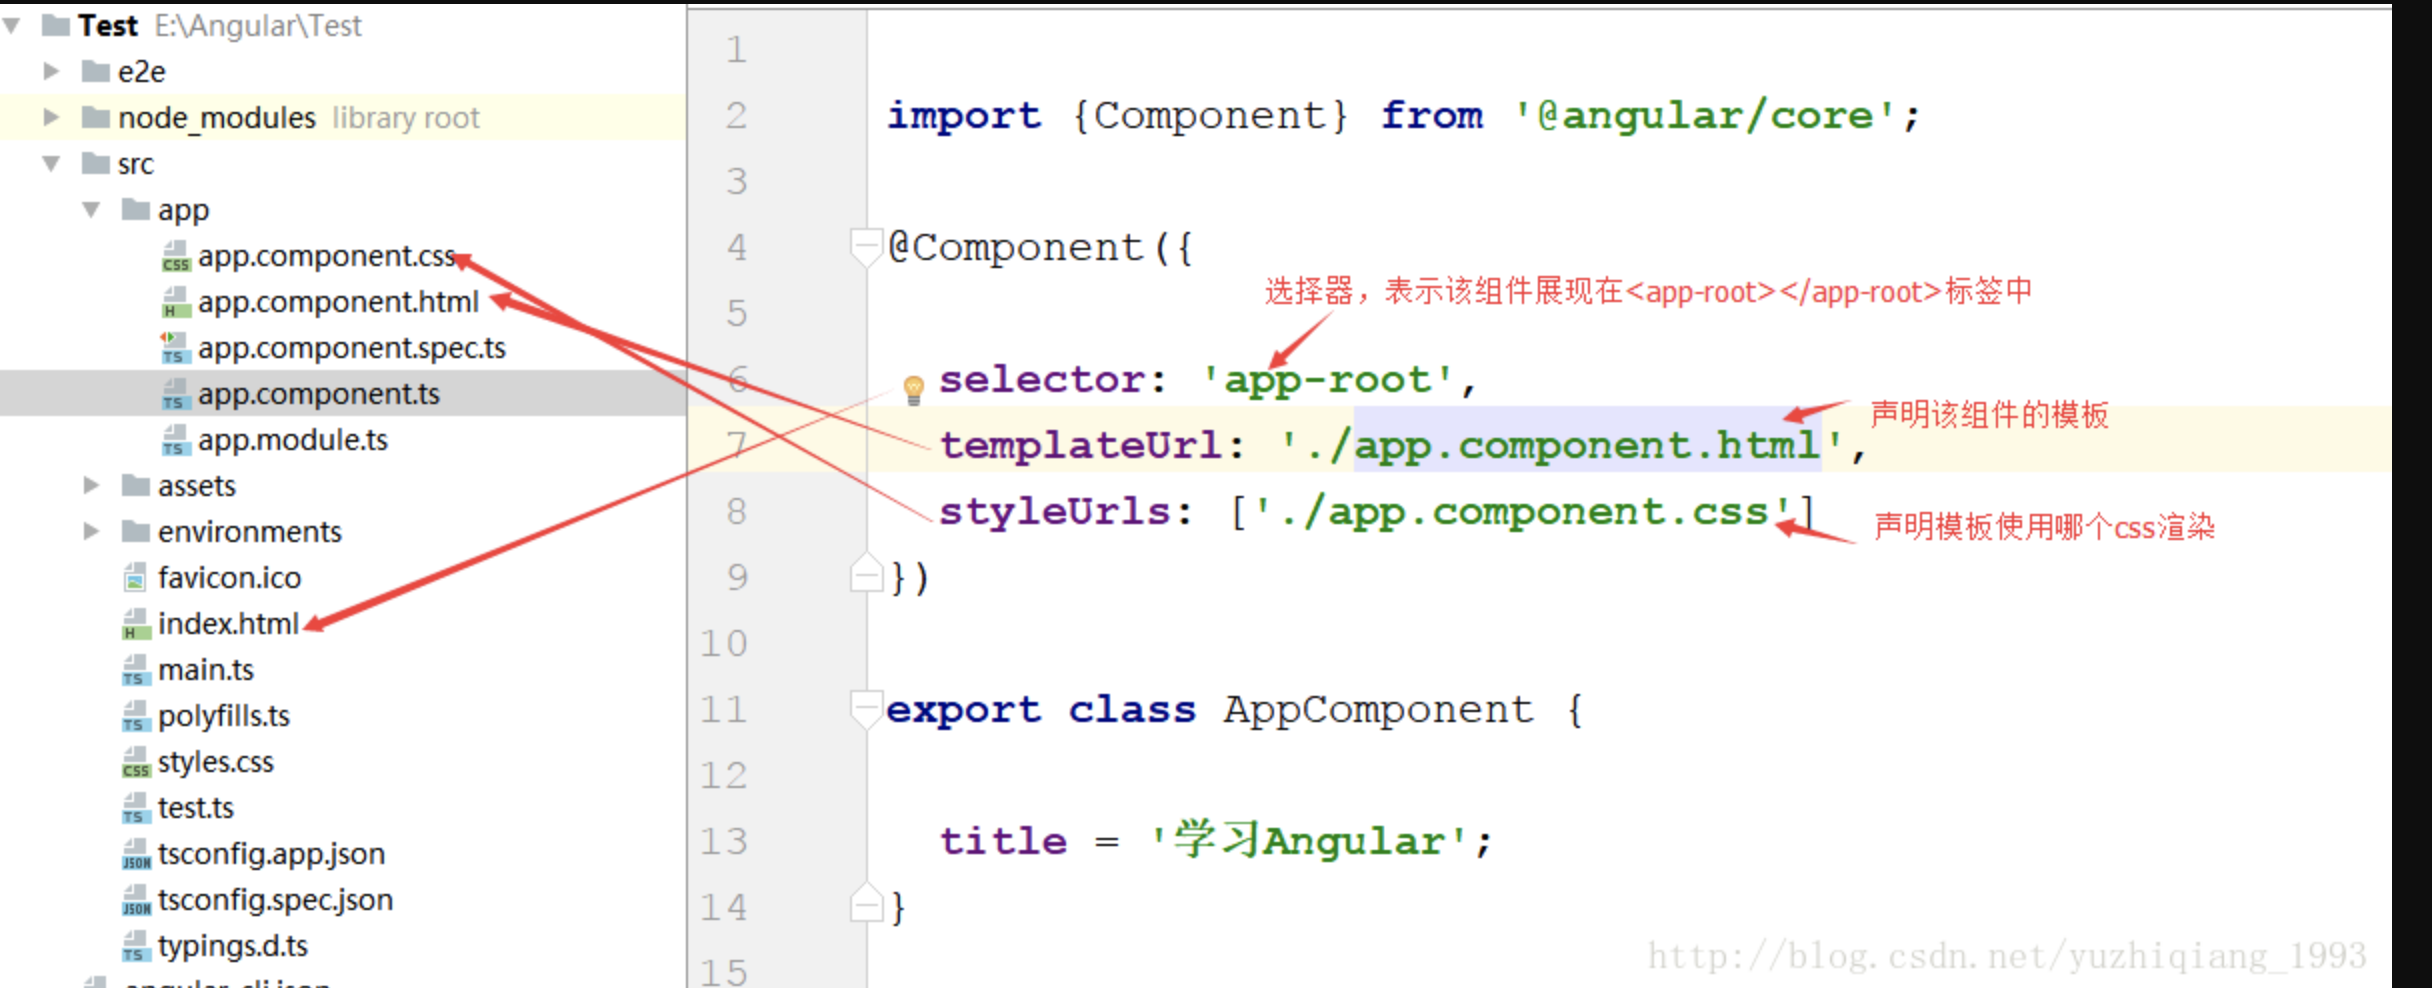
我们来看看`app.component.ts`中的代码,并解释下代码的意义

```js
/*这里是从Angular核心模块里面引入了component装饰器*/
import {Component} from '@angular/core';
/*用装饰器定义了一个组件以及组件的元数据 所有的组件都必须使用这个装饰器来注解*/
@Component({
/*组件元数据 Angular会通过这里面的属性来渲染组件并执行逻辑
* selector就是css选择器,表示这个组件可以通过app-root来调用,index.html中有个Loading...标签,这个标签用来展示该组件的内容
*templateUrl 组件的模板,定义了组件的布局和内容
*styleUrls 该模板引用那个css样式
* */
selector: 'app-root',
templateUrl: './app.component.html',
styleUrls: ['./app.component.css']
})
/*AppComponent本来就是一个普通的typescript类,但是上面的组件元数据装饰器告诉Angular,AppComponent是一个组件,需要把一些元数据附加到这个类上,Angular就会把AppComponent当组件来处理*/
export class AppComponent {
/*这个类实际上就是该组件的控制器,我们的业务逻辑就是在这个类中编写*/
title = '学习Angular';
}
```
**组件相关的概念**
1. 组件元数据装饰器(`@Component`)
简称组件装饰器,用来告知`Angular`框架如何处理一个`TypeScript`类.
`Component`装饰器包含多个属性,这些属性的值叫做元数据,`Angular`会根据这些元数据的值来渲染组件并执行组件的逻辑
2. 模板(`Template`)
我们可以通过组件自带的模板来定义组件的外观,模板以`html`的形式存在,告诉`Angular`如何来渲染组件,一般来说,模板看起来很像`html`,但是我们可以在模板中使用`Angular`的数据绑定语法,来呈现控制器中的数据。
3. 控制器(`controller`)
控制器就是一个普通的`typescript`类,他会被`@Component`来装饰,控制器会包含组件所有的属性和方法,绝大多数的业务逻辑都是写在控制器里的。控制器通过数据绑定与模板来通讯,模板展现控制器的数据,控制器处理模板上发生的事件。
**装饰器**,模板和控制器是组件的必备要素。还有一些可选的元素,比如:
- 输入属性(`@inputs`):是用来接收外部传入的数据的,`Angular`的程序结构就是一个组件树,输入属性允许在组件树种传递数据
提供器(`providers`):这个是用来做依赖注入的
- 生命周期钩子(`LifeCycle Hooks`):一个组件从创建到销毁的过程中会有多个钩子会被触发,类似于Android中的`Activity`的生命周期
- 样式表:组件可以关联一些样式表
- 动画(`Animations`): `Angular`提供了一个动画包来帮助我们方便的创建一些跟组件相关的动画效果,比如淡入淡出等
- 输出属性(`@Outputs`):用来定义一些其他组件可能需要的事件或者用来在组件之间共享数据
> 组件的中关系就如下图所示
下面我们来看看模块文件
- `app.module.ts`:这个文件表示模块
- 与`AppComponent`类似,模块也需要装饰器来装饰
```js
import { BrowserModule } from '@angular/platform-browser';
import { NgModule } from '@angular/core';
import { AppRoutingModule } from './app-routing.module';
import { AppComponent } from './app.component';
import { HeroesComponent } from './heroes/heroes.component';
@NgModule({
declarations: [
// 声明模块里有什么东西 只能声明:组件/指令/管道
AppComponent,
HeroesComponent
],
// 声明该模块所依赖的模块
imports: [
BrowserModule,
AppRoutingModule
],
// 默认情况下是空的
providers: [],
// 声明模块的主组件是什么
bootstrap: [AppComponent]
})
export class AppModule { }
```
## 2.4 Angular cli
> https://cli.angular.io
> 通过`ng g`列出当前命令

**1. 创建新组件 `ng generate component component-name`**
> `ng g component components/header` 指定生成到哪个目录
该命令会把生成的组件,添加到 `src/app/app.module.ts` 文件中 `@NgModule` 的 `declarations` 列表中声明

**2. 使用 Angular CLI 创建一个名叫 hero 的服务**
```
ng generate service hero
```
> 该命令会在 `src/app/hero.service.ts` 中生成 `HeroService` 类的骨架。 `HeroService` 类的代码如下:
```js
import { Injectable } from '@angular/core';
@Injectable({
providedIn: 'root',
})
export class HeroService {
constructor() { }
}
```
**3. 添加 AppRoutingModule**
```js
ng generate module app-routing --flat --module=app
```
- `--flat` 把这个文件放进了 `src/app` 中,而不是单独的目录中。
- `--module=app` 告诉 `CLI` 把它注册到 `AppModule`的 `imports` 数组中。
生成的文件是这样的:
```js
src/app/app-routing.module.ts (generated)
content_copy
import { NgModule } from '@angular/core';
import { CommonModule } from '@angular/common';
@NgModule({
imports: [
CommonModule
],
declarations: []
})
export class AppRoutingModule { }
```
修改后
```js
import { NgModule } from '@angular/core';
import { Routes, RouterModule } from '@angular/router';
const routes: Routes = [];
@NgModule({
imports: [RouterModule.forRoot(routes)],
exports: [RouterModule]
})
export class AppRoutingModule { }
```
## 三、angular组件及组件里的模板
## 3.1 创建angualr组件
**1. 创建组件**
```bash
ng g component components/header
```
**2. 使用组件**
```html
```
## 3.2 Angular 绑定数据
**1. 数据文本绑定**
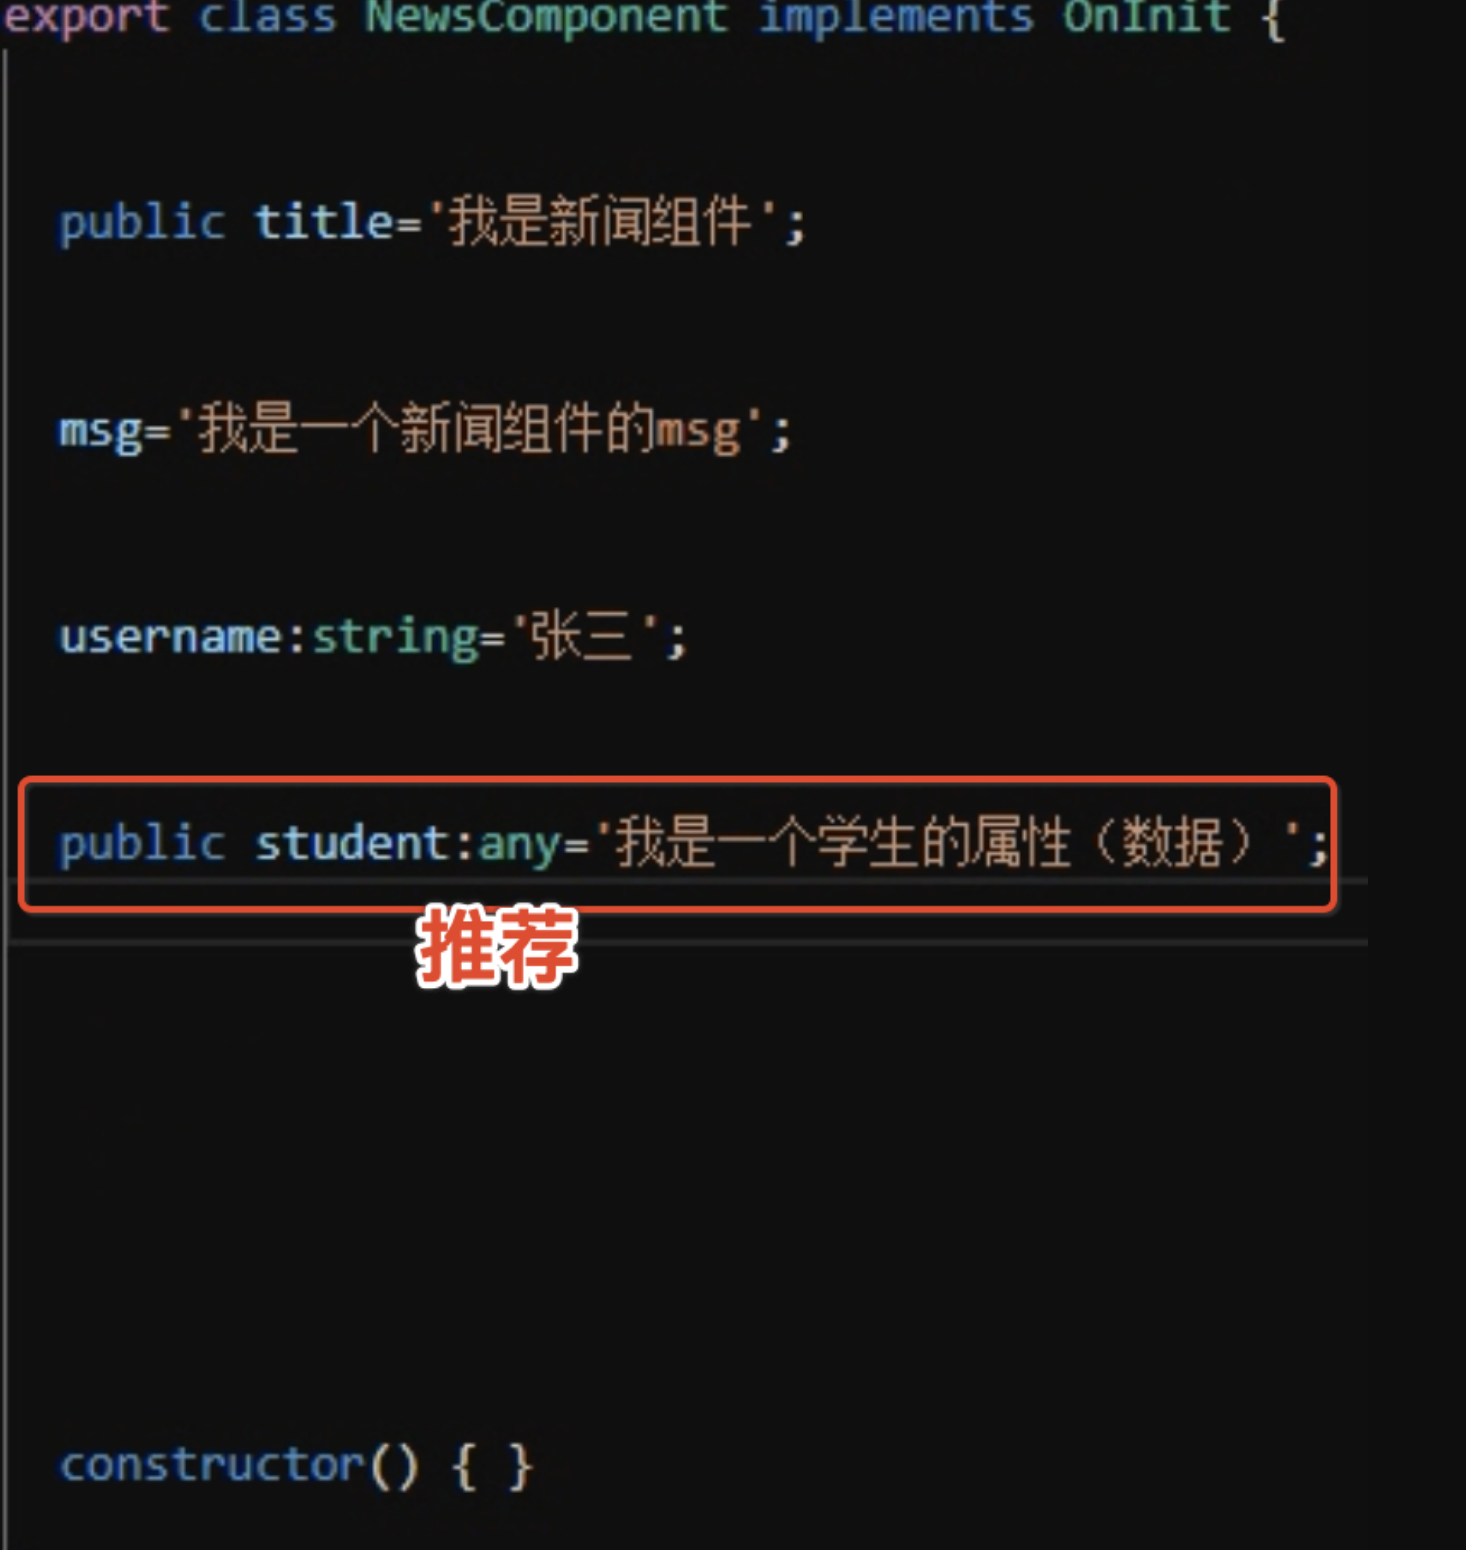
> 定义数据几种方式
```html
{{title}}
```
**2. 绑定`HTML`**
```js
this.h="这是一个 h2 用[innerHTML]来解析
"
```
```html
```
## 3.3 声明属性的几种方式
- `public` 共有(默认) 可以在类里外使用
- `protected` 保护类型 只能在当前类和子类中使用
- `private` 私有类型 只能在当期类使用
## 3.4 绑定属性
> 用`[]`包裹
```html
调试工具看看我的属性
```

## 3.5 数据循环 *ngFor
**1. *ngFor 普通循环**
```js
export class HomeComponent implements OnInit {
arr = [{ name: 'poetries', age: 22 }, { name: 'jing' , age: 31}];
constructor() { }
ngOnInit() {
}
}
```
```html
- {{item.name}}- {{item.age}}
```
**2. 循环的时候设置 key**
```html
```
**3. template 循环数据**
```html
```
## 3.6 条件判断 *ngIf
```html
这是 ngIF 判断是否显示
这是 ngIF 判断是否显示
```
## 3.7 *ngSwitch
```html
```
## 3.8 执行事件 (click)=”getData()”
```html
```
```js
getData(){ /*自定义方法获取数据*/ //获取
alert(this.msg);
}
setData(){
//设置值
this.msg='这是设置的值';
}
```
## 3.9 表单事件
```html
```
```js
keyUpFn(e){
console.log(e)
}
```
## 3.10 双向数据绑定
```html
```
> 注意引入:`FormsModule`
```js
import {FormsModule} from '@angular/forms'
NgModule({
declarations: [
AppComponent,
HeaderComponent,
FooterComponent,
NewsComponent
],
imports: [
BrowserModule,
FormsModule
],
providers: [],
bootstrap: [AppComponent]
})
export class AppModule { }
```
```html
{{inputValue}}
```
## 3. 11 [ngClass]、[ngStyle]
**1. [ngClass]:**
```html
这是一个 div
```
```js
public flag=false;
```
```html
这是一个 div
```
```js
public arr = [1, 3, 4, 5, 6];
```
```html
```
**2. [ngStyle]:**
```html
你好 ngStyle
```
```js
public attr='red';
```
```html
你好 ngStyle
```
## 3.12 管道
```js
public today=new Date();
```
```html
{{today | date:'yyyy-MM-dd HH:mm:ss' }}
```
**其他管道**
> `angular`中的管道(`pipe`)是用来对输入的数据进行处理,如大小写转换、数值和日期格式化等
> `angular`中的管道(`pipe`) 以及自定义管道适用于`angular4 angualr5 angualr6 angular7`
常用的管道(`pipe`)有
**1. 大小写转换**
```html
{{str | uppercase}}
{{str | lowercase}}
```
**2. 日期格式转换**
```html
{{today | date:'yyyy-MM-dd HH:mm:ss' }}
```
**3. 小数位数**
> 接收的参数格式为`{最少整数位数}.{最少小数位数}-{最多小数位数}`
```html
{{p | number:'1.2-4'}}
```
**4. JavaScript 对象序列化**
```html
{{ { name: 'semlinker' } | json }}
```
**5. slice**
```html
{{ 'semlinker' | slice:0:3 }}
```
**6. 管道链**
```html
{{ 'semlinker' | slice:0:3 | uppercase }}
```
**7. 自定义管道**
自定义管道的步骤:
- 使用 `@Pipe` 装饰器定义 `Pipe` 的 `metadata` 信息,如 `Pipe` 的名称 - 即 `name` 属性
- 实现 `PipeTransform` 接口中定义的 `transform` 方法
**7.1 WelcomePipe 定义**
```js
import { Pipe, PipeTransform } from '@angular/core';
[@Pipe](/user/Pipe)({ name: 'welcome' })
export class WelcomePipe implements PipeTransform {
transform(value: string): string {
if(!value) return value;
if(typeof value !== 'string') {
throw new Error('Invalid pipe argument for WelcomePipe');
}
return "Welcome to " + value;
}
}
```
**7.2 WelcomePipe 使用**
```html
{{ 'semlinker' | welcome }}
{{ 'semlinker' | welcome }}
```
**7.3 RepeatPipe 定义**
```js
import {Pipe, PipeTransform} from '@angular/core';
[@Pipe](/user/Pipe)({name: 'repeat'})
export class RepeatPipe implements PipeTransform {
transform(value: any, times: number) {
return value.repeat(times);
}
}
```
**7.4 RepeatPipe 使用**
```html
{{ 'lo' | repeat:3 }}
{{ 'lo' | repeat:3 }}
```
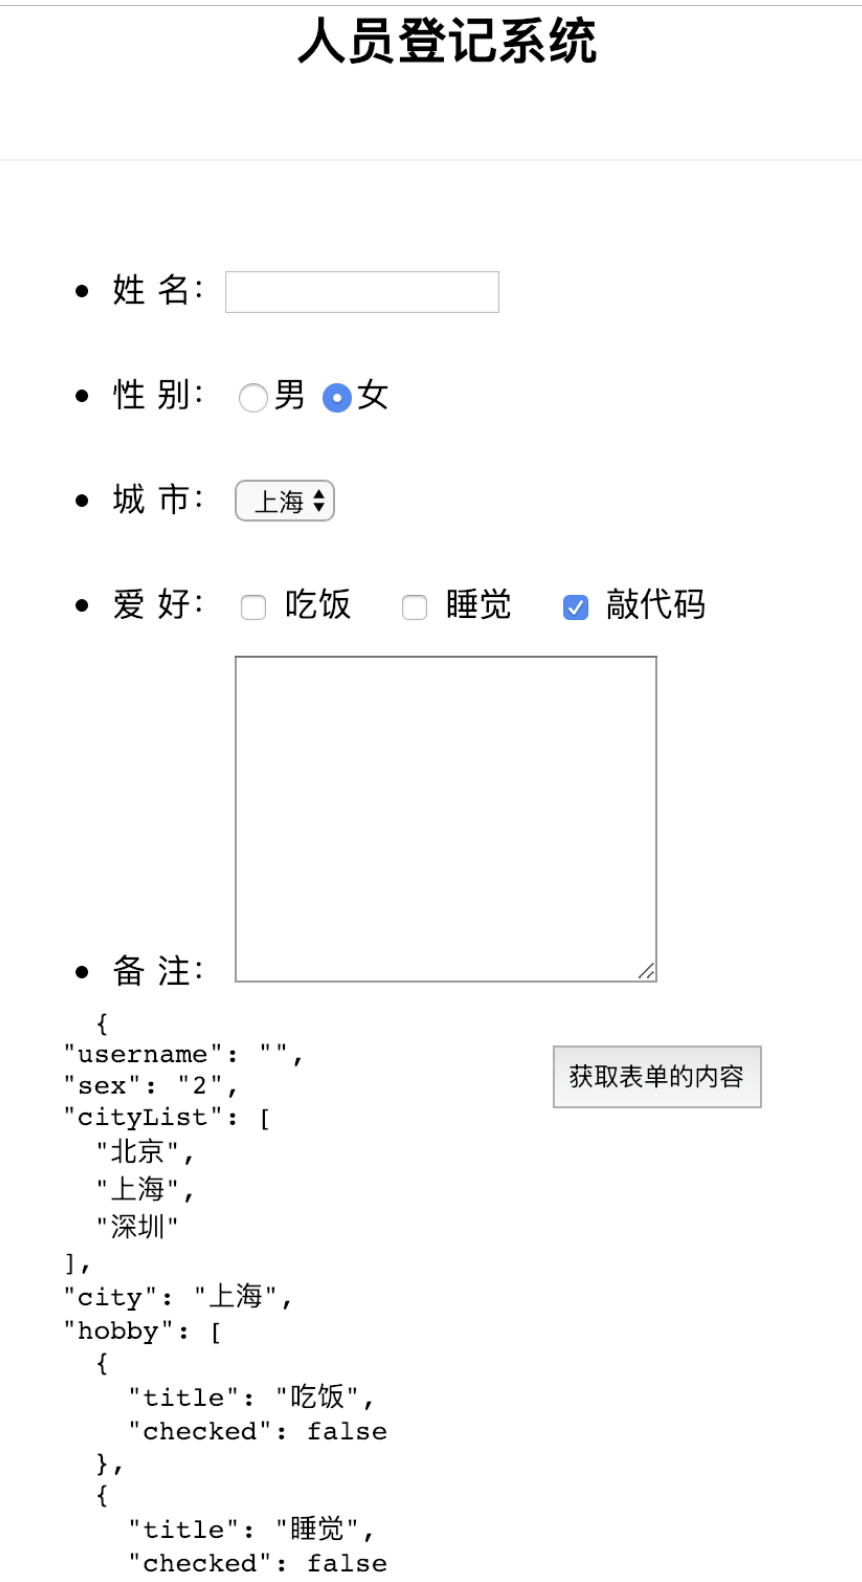
## 3.13 实现一个人员登记表单-案例
```bash
# 创建组件
ng g component components/form
```
```js
import { Component, OnInit } from '@angular/core';
@Component({
selector: 'app-form',
templateUrl: './form.component.html',
styleUrls: ['./form.component.scss']
})
export class FormComponent implements OnInit {
public peopleInfo:any = {
username: '',
sex: '2',
cityList: ['北京', '上海', '深圳'],
city: '上海',
hobby:[{
title: '吃饭',
checked:false
},{
title:'睡觉',
checked:false
},{
title:'敲代码',
checked:true
}],
mark:''
}
constructor() { }
ngOnInit() {
}
doSubmit(){
/*
jquery dom操作
let usernameDom:any=document.getElementById('username');
console.log(usernameDom.value);
*/
console.log(this.peopleInfo);
}
}
```
```html
人员登记系统
{{peopleInfo | json}}
```
```scss
h2{
text-align: center;
}
.people_list{
width: 400px;
margin: 40px auto;
padding:20px;
border:1px solid #eee;
li{
height: 50px;
line-height: 50px;
.fonm_input{
width: 300px;
height: 28px;
}
}
.submit{
width: 100px;
height: 30px;
float: right;
margin-right: 50px;
margin-top:120px;
}
}
```
## 3.14 实现一个完整的ToDo-案例
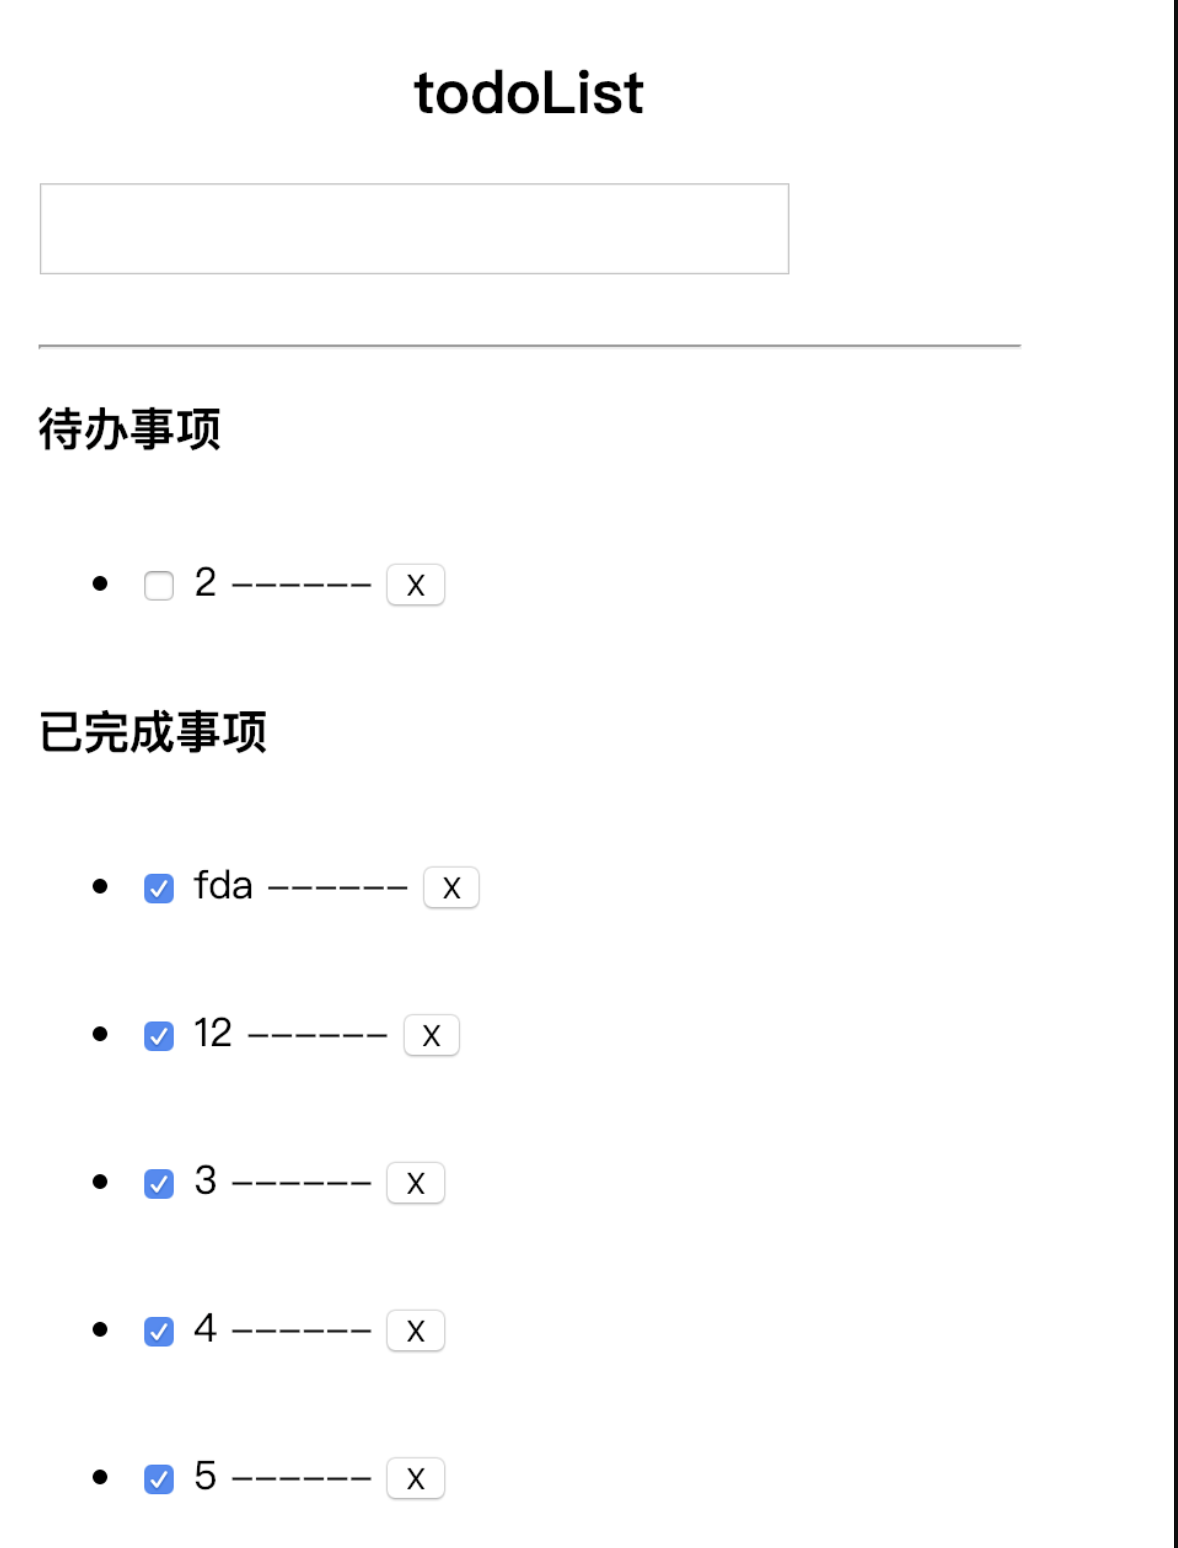
**基础版**
```bash
# 创建组件
ng g component components/todo
```
```html
todoList
```
```js
import { Component, OnInit } from '@angular/core';
@Component({
selector: 'app-todo',
templateUrl: './todo.component.html',
styleUrls: ['./todo.component.scss']
})
export class TodoComponent implements OnInit {
public keyword: string;
public todolist: any[] = [];
constructor() { }
ngOnInit() {
}
doAdd(e){
if(e.keyCode == 13){
if(!this.todolistHasKeyword(this.todolist, this.keyword)){
this.todolist.push({
title: this.keyword,
status: 0 //0表示代办事项 1表示已完成事项
});
this.keyword='';
}else{
alert('数据已经存在');
this.keyword='';
}
}
}
deleteData(key){
this.todolist.splice(key,1);
}
//如果数组里面有keyword返回true 否则返回false
todolistHasKeyword(todolist:any, keyword:any){
//异步 会存在问题
// todolist.forEach(value => {
// if(value.title==keyword){
// return true;
// }
// });
if(!keyword) return false;
for(var i=0; i
```
```js
import { Component, OnInit } from '@angular/core';
@Component({
selector: 'app-search',
templateUrl: './search.component.html',
styleUrls: ['./search.component.scss']
})
export class SearchComponent implements OnInit {
public keyword: string;
public historyList: any[] = [];
constructor() { }
ngOnInit() {
}
doSearch(){
if(this.historyList.indexOf(this.keyword)==-1){
this.historyList.push(this.keyword);
}
this.keyword = '';
}
deleteHistroy(key){
alert(key);
this.historyList.splice(key,1);
}
}
```
```scss
.search{
width: 400px;
margin: 20px auto;
input{
margin-bottom: 20px;
width: 300px;
height: 32px;
}
button{
height: 32px;
width: 80px;
}
}
```
## 四、Angular 中的服务
## 4.1 服务
> 定义公共的方法,使得方法在组件之间共享调用

**1. 创建服务命令**
```bash
ng g service my-new-service
# 创建到指定目录下面
ng g service services/storage
```
**2. app.module.ts 里面引入创建的服务**
```js
// app.module.ts 里面引入创建的服务
import { StorageService } from './services/storage.service';
```
```js
// NgModule 里面的 providers 里面依赖注入服务
NgModule({
declarations: [
AppComponent,
HeaderComponent,
FooterComponent,
NewsComponent,
TodolistComponent
], imports: [
BrowserModule,
FormsModule
],
providers: [StorageService],
bootstrap: [AppComponent]
})
export class AppModule { }
```
**3. 使用的页面引入服务,注册服务**
```js
import { StorageService } from '../../services/storage.service';
```
```js
constructor(private storage: StorageService) {
}
```
```js
// 使用
addData(){
// alert(this.username);
this.list.push(this.username);
this.storage.set('todolist',this.list);
}
removerData(key){
console.log(key);
this.list.splice(key,1);
this.storage.set('todolist',this.list);
}
```
## 4.2 改造上面的Todo、searchList
**searchList**
```js
import { Component, OnInit } from '@angular/core';
// 引入服务
import { StorageService } from '../../services/storage.service';
@Component({
selector: 'app-search',
templateUrl: './search.component.html',
styleUrls: ['./search.component.scss']
})
export class SearchComponent implements OnInit {
public keyword: string;
public historyList: any[] = [];
constructor(public storage: StorageService) {
console.log(this.storage.get());
}
ngOnInit() {
// 修改的地方
var searchlist:any=this.storage.get('searchlist');
if(searchlist){
this.historyList=searchlist;
}
}
doSearch(){
if(this.historyList.indexOf(this.keyword)==-1){
this.historyList.push(this.keyword);
// 修改的地方
this.storage.set('searchlist',this.historyList);
}
this.keyword = '';
}
deleteHistroy(key){
alert(key);
this.historyList.splice(key,1);
}
}
```
**TODOLIST**
```js
ngOnInit() {
// 修改的地方
var todolist:any=this.storage.get('todolist');
if(todolist){
this.todolist=todolist;
}
}
doAdd(e){
if(e.keyCode==13){
if(!this.todolistHasKeyword(this.todolist,this.keyword)){
this.todolist.push({
title:this.keyword,
status:0 //0表示代办事项 1表示已完成事项
});
this.keyword='';
// 修改的地方
this.storage.set('todolist',this.todolist); //用到this一定要注意this指向
}else{
alert('数据已经存在');
this.keyword='';
}
}
}
// 修改的地方
checkboxChange(){
console.log('事件触发了');
this.storage.set('todolist',this.todolist);
}
```
```html
todoList
```
## 五、Dom 操作以及@ViewChild、 执行 css3 动画
**1. Angular 中的 dom 操作(原生 js)**
```js
ngAfterViewInit(){
var boxDom:any=document.getElementById('box'); boxDom.style.color='red';
}
```
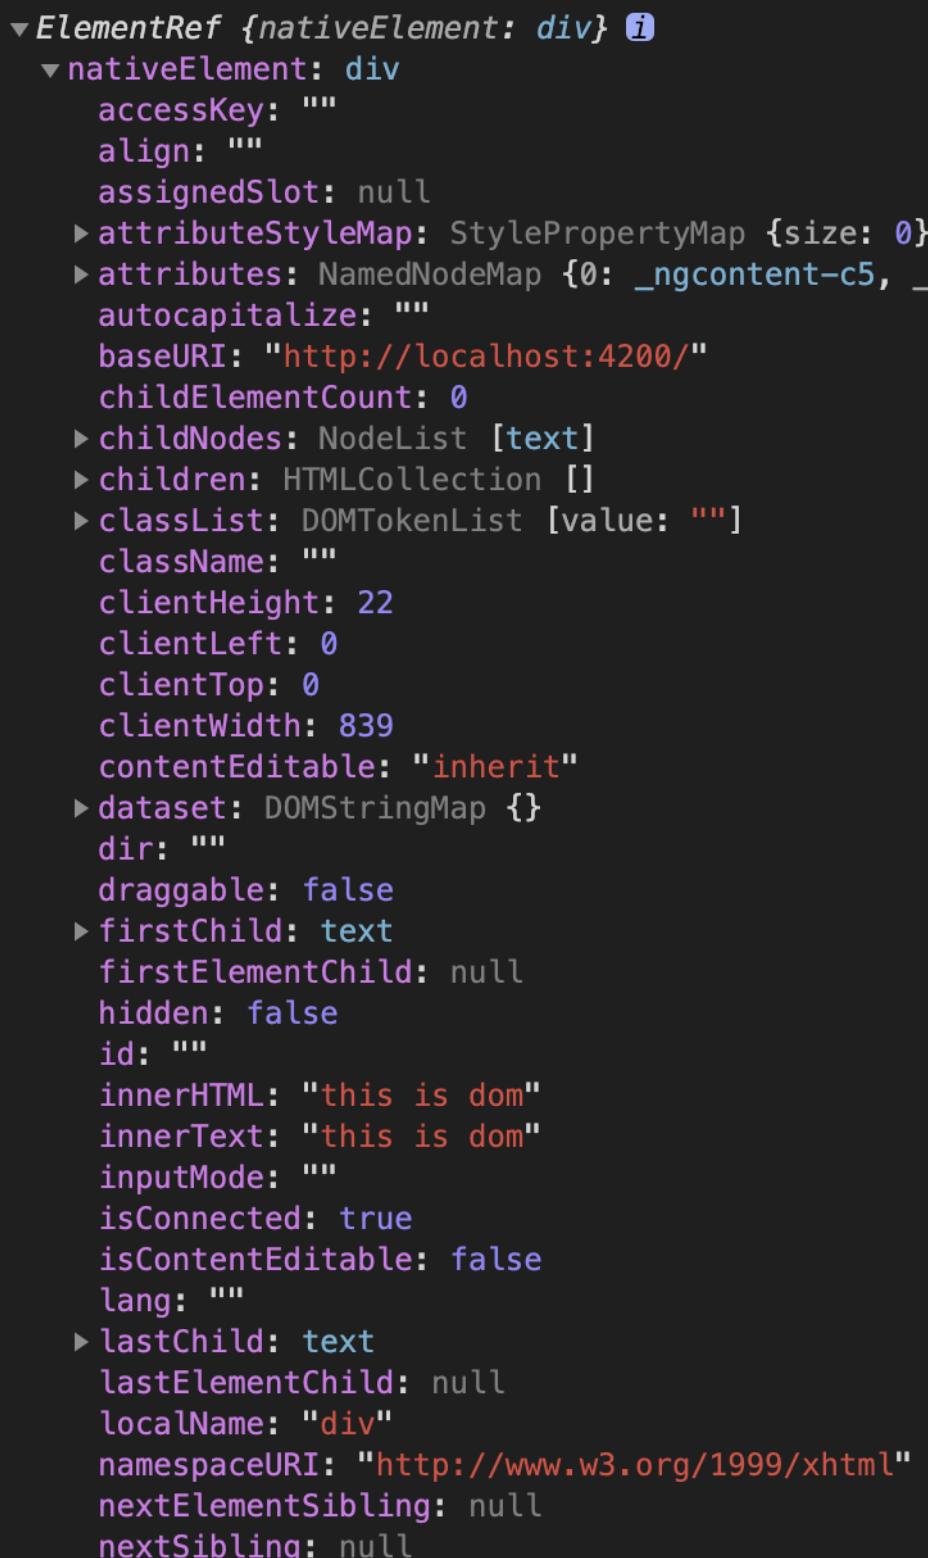
**2. Angular 中的 dom 操作(ViewChild)**
```js
import { Component ,ViewChild,ElementRef} from '@angular/core';
```
```js
@ViewChild('myattr') myattr: ElementRef;
```
```html
```
```js
ngAfterViewInit(){
let attrEl = this.myattr.nativeElement;
}
```
**3. 父子组件中通过 ViewChild 调用子组件 的方法**
> 调用子组件给子组件定义一个名称
```html
```
> 引入 `ViewChild`
```js
import { Component, OnInit ,ViewChild} from '@angular/core';
```
> `ViewChild` 和刚才的子组件关联起来
```js
@ViewChild('footerChild') footer
```
> 在父组件中调用子组件方法
```js
run(){
this.footer.footerRun();
}
```
## 六、Angular 父子组件以及组件之间通讯
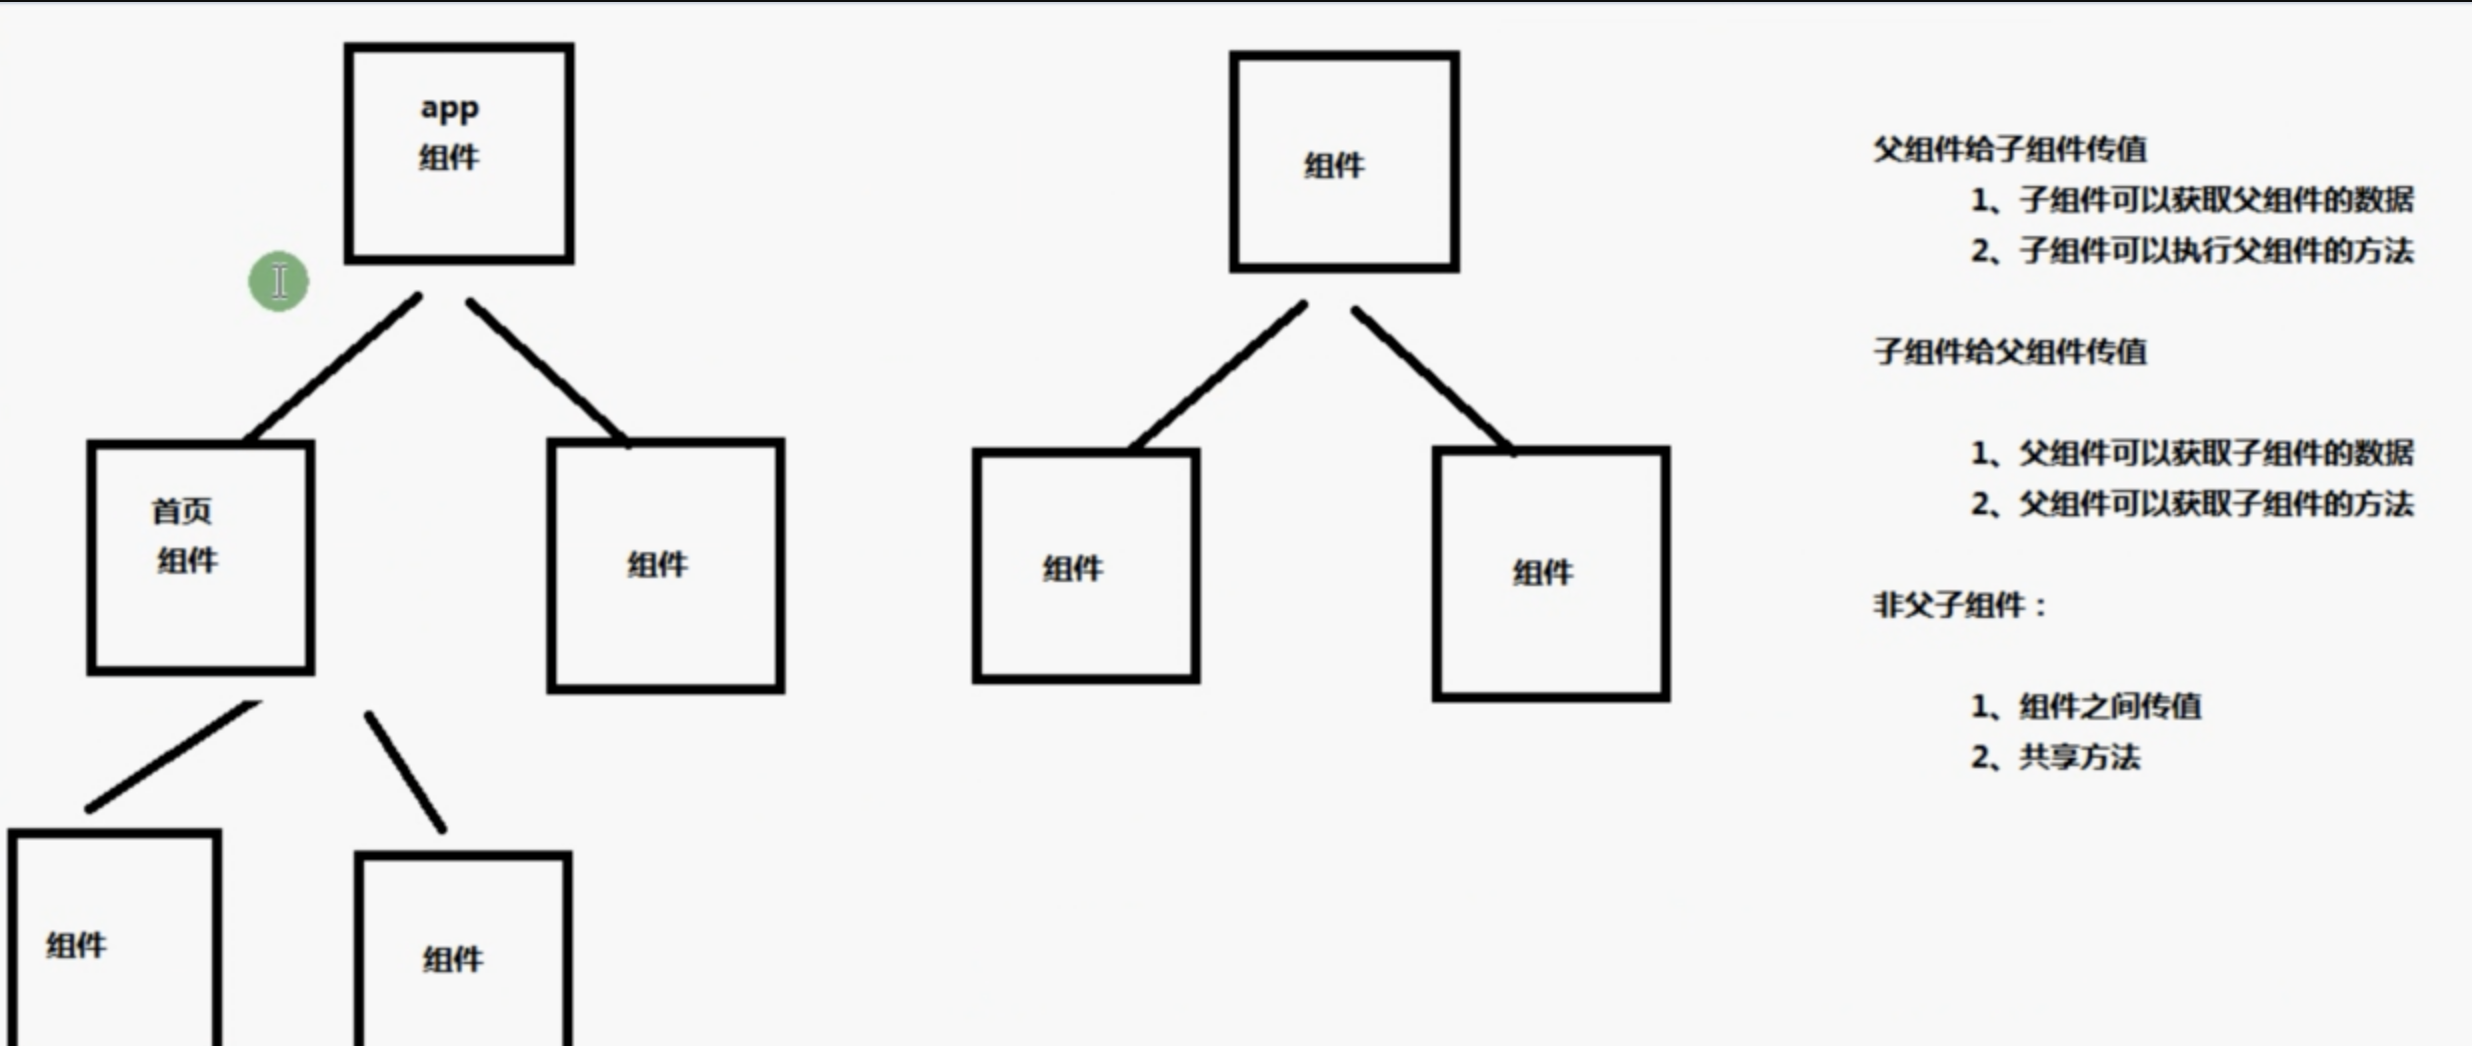
## 6.1 父组件给子组件传值-@input
> 父组件不仅可以给子组件传递简单的数据,还可把自己的方法以及整个父组件传给子组件
**1. 父组件调用子组件的时候传入数据**
```html
```
**2. 子组件引入 Input 模块**
```js
import { Component, OnInit ,Input } from '@angular/core';
```
**3. 子组件中 @Input 接收父组件传过来的数据**
```js
export class HeaderComponent implements OnInit {
@Input() msg:string
constructor() { }
ngOnInit() {
}
}
```
**4. 子组件中使用父组件的数据**
```html
child works!
{{msg}}
```
**5. 把整个父组件传给子组件**
> 通过`this`传递整个组件实例
```html
```
```js
export class HeaderComponent implements OnInit {
@Input() home:any
constructor() { }
ngOnInit() {
}
}
```
> 执行父组件方法 `this.home.xxx()`
## 6.2 子组件通过@Output 触发父组件的方法(了解)
**1. 子组件引入 Output 和 EventEmitter**
```js
import { Component, OnInit ,Input,Output,EventEmitter} from '@angular/core';
```
**2. 子组件中实例化 EventEmitter**
```js
@Output() private outer=new EventEmitter(); /*用EventEmitter和output装饰器配合使用 指定类型变量*/
```
**3. 子组件通过 EventEmitter 对象 outer 实例广播数据**
```js
sendParent(){
// alert('zhixing');
this.outer.emit('msg from child')
}
```
**4. 父组件调用子组件的时候,定义接收事件 , outer 就是子组件的 EventEmitter 对象 outer**
```html
```
**5. 父组件接收到数据会调用自己的 runParent 方法,这个时候就能拿到子组件的数据**
```js
//接收子组件传递过来的数据
runParent(msg:string){
alert(msg);
}
```
## 6.3 父组件通过@ViewChild 主动获取子组 件的数据和方法
**1. 调用子组件给子组件定义一个名称**
```html
```
**2. 引入 ViewChild**
```js
import { Component, OnInit ,ViewChild} from '@angular/core';
```
**3. ViewChild 和刚才的子组件关联起来**
```js
@ViewChild('footerChild') footer;
```
**4. 调用子组件**
```js
run(){ this.footer.footerRun();
}
```
## 6.4 非父子组件通讯
- 公共的服务
- `Localstorage` (推荐)
- `Cookie`
## 七、Angular 中的生命周期函数
## 7.1 Angular中的生命周期函数
> 官方文档:https://www.angular.cn/guide/lifecycle-hooks
- 生命周期函数通俗的讲就是组件创建、组件更新、组件销毁的时候会触发的一系列的方法。
- 当 `Angular` 使用构造函数新建一个组件或指令后,就会按下面的顺序在特定时刻调用这些 生命周期钩子方法。
- 每个接口都有唯一的一个钩子方法,它们的名字是由接口名再加上`ng`前缀构成的,比如`OnInit`接口的钩子方法叫做`ngOnInit`.
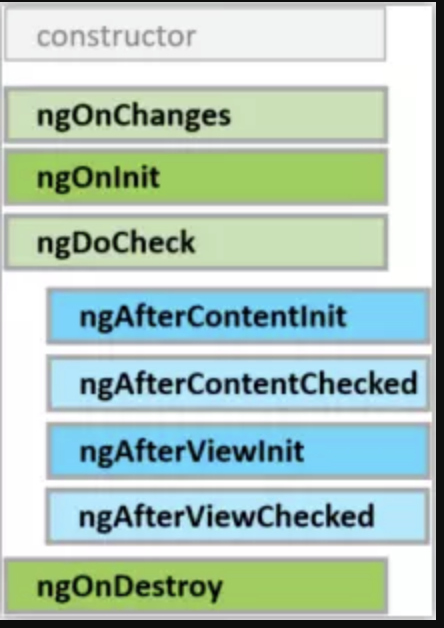
**1. 生命周期钩子分类**
> 基于指令与组件的区别来分类
**指令与组件共有的钩子**
- `ngOnChanges`
- `ngOnInit`
- `ngDoCheck`
- `ngOnDestroy`
**组件特有的钩子**
- `ngAfterContentInit`
- `ngAfterContentChecked`
- `ngAfterViewInit`
- `ngAfterViewChecked`
**2. 生命周期钩子的作用及调用顺序**
1、`ngOnChanges` - 当数据绑定输入属性的值发生变化时调用
2、`ngOnInit` - 在第一次 `ngOnChanges` 后调用
3、`ngDoCheck` - 自定义的方法,用于检测和处理值的改变
4、`ngAfterContentInit` - 在组件内容初始化之后调用
5、`ngAfterContentChecked` - 组件每次检查内容时调用
6、`ngAfterViewInit` - 组件相应的视图初始化之后调用
7、`ngAfterViewChecked` - 组件每次检查视图时调用
8、`ngOnDestroy` - 指令销毁前调用
**3. 首次加载生命周期顺序**
```js
export class LifecircleComponent {
constructor() {
console.log('00构造函数执行了---除了使用简单的值对局部变量进行初始化之外,什么都不应该做')
}
ngOnChanges() {
console.log('01ngOnChages执行了---当被绑定的输入属性的值发生变化时调用(父子组件传值的时候会触发)');
}
ngOnInit() {
console.log('02ngOnInit执行了--- 请求数据一般放在这个里面');
}
ngDoCheck() {
console.log('03ngDoCheck执行了---检测,并在发生 Angular 无法或不愿意自己检测的变化时作出反应');
}
ngAfterContentInit() {
console.log('04ngAfterContentInit执行了---当把内容投影进组件之后调用');
}
ngAfterContentChecked() {
console.log('05ngAfterContentChecked执行了---每次完成被投影组件内容的变更检测之后调用');
}
ngAfterViewInit() : void {
console.log('06 ngAfterViewInit执行了----初始化完组件视图及其子视图之后调用(dom操作放在这个里面)');
}
ngAfterViewChecked() {
console.log('07ngAfterViewChecked执行了----每次做完组件视图和子视图的变更检测之后调用');
}
ngOnDestroy() {
console.log('08ngOnDestroy执行了····');
}
//自定义方法
changeMsg() {
this.msg = "数据改变了";
}
}
```
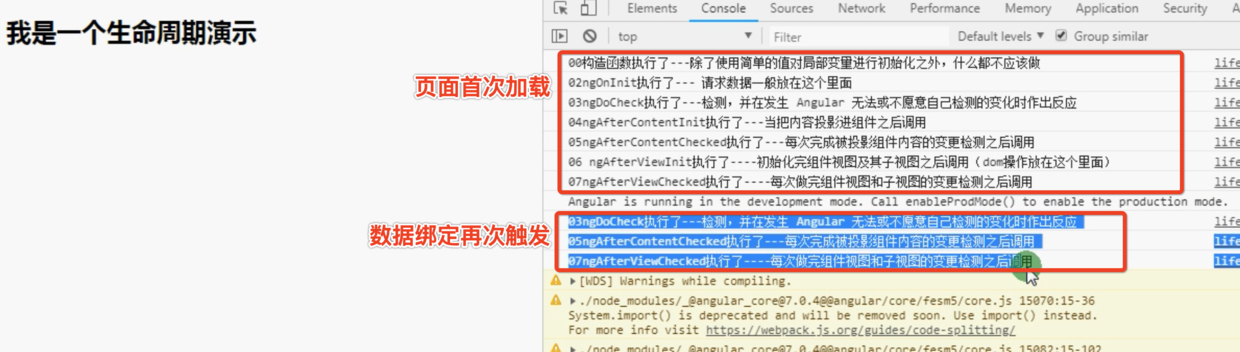
> 带`check`的可以对数据做响应操作
```html
```
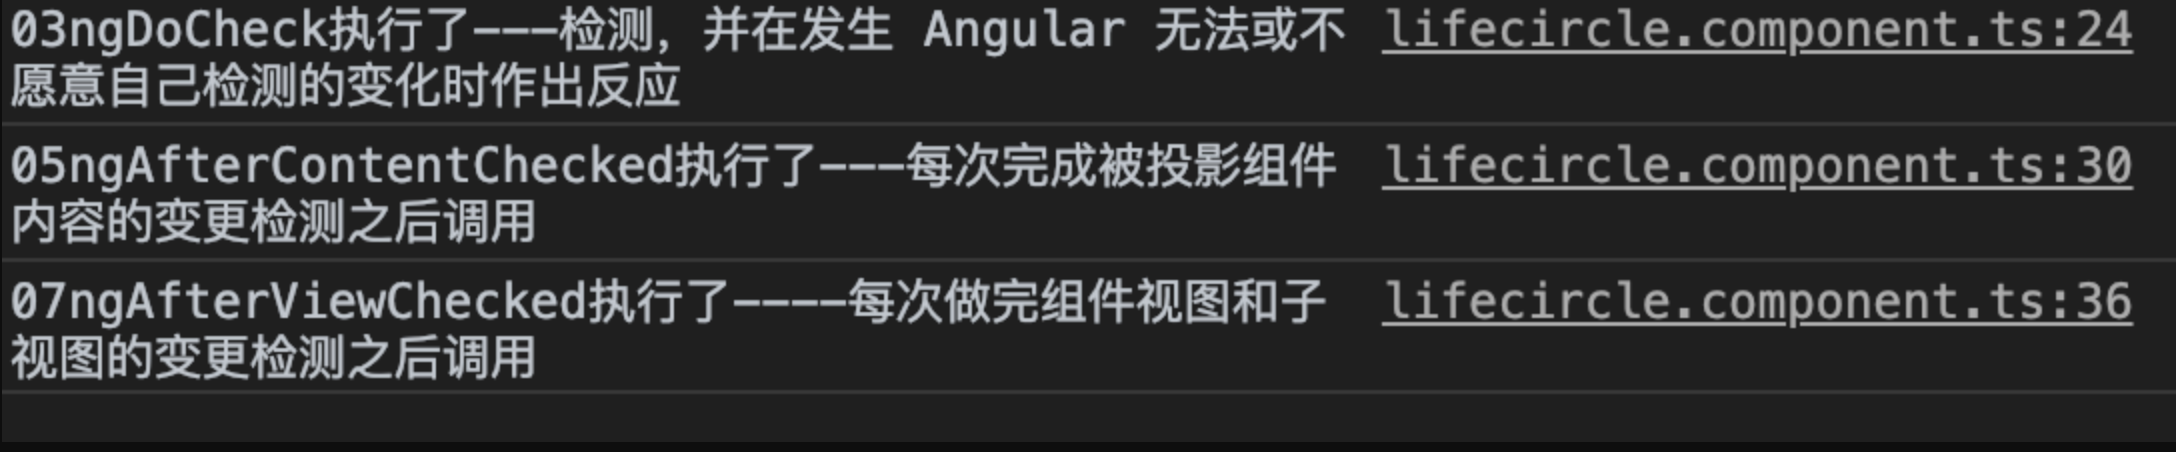
> 点击按钮/双向数据绑定此时触发了以下生命周期。只要数据改变

> 可以在`check`做一些操作
```js
ngDoCheck() {
//写一些自定义的操作
console.log('03ngDoCheck执行了---检测,并在发生 Angular 无法或不愿意自己检测的变化时作出反应');
if(this.userinfo!==this.oldUserinfo){
console.log(`你从${this.oldUserinfo}改成${this.userinfo}`);
this.oldUserinfo = this.userinfo;
}else{
console.log("数据没有变化");
}
}
```
## 7.2 生命周期钩子详解
### 7.2.1 constructor-掌握
> `constructor`,来初始化类。`Angular`中的组件就是基于`class`类实现的,在`Angular`中,`constructor`用于注入依赖。组件的构造函数会在所有的生命周期钩子之前被调用,它主要用于依赖注入或执行简单的数据初始化操作。
```js
import { Component, ElementRef } from '@angular/core';
@Component({
selector: 'my-app',
template: `
Welcome to Angular World
Hello {{name}}
`,
})
export class AppComponent {
name: string = '';
constructor(public elementRef: ElementRef) {//使用构造注入的方式注入依赖对象
// 执行初始化操作
this.name = 'Semlinker';
}
}
```
### 7.2.2 ngOnChanges()
> 当 `Angular`(重新)设置数据绑定输入属性时响应。该 方法接受当前和上一属性值的 `SimpleChanges` 对象 当被绑定的输入属性的值发生变化时调用,首次调用一 定会发生在 `ngOnInit() `之前。
```html
```
> 此时改变`title`会触发`ngOnChanges`生命周期,并且也会触发
### 7.2.3 ngOnInit()--掌握
---
> 以上是免费部分。完整内容需要「前端进阶之旅」会员,原文:https://feinterview.poetries.top/docs/fe-blog-docs/blog-docs/angular/-Angular7%E5%85%A5%E9%97%A8%E6%80%BB%E7%BB%93%E7%AF%87